How to make DIY Carnival masks with your children: necessary, procedures and models of masks, including unicorns, animals and superheroes. Let’s see how to do it.

The February 16, 2021 is the day of Carnival, a traditional festival full of folklore, loved by young and old. For the first time we should give up the celebrations in a big way, however we can give a touch of color to the day realizing the DIY carnival masks.
A sentence from Nikolaj Evreinov says: at carnival the whole world is young, even the old ones. At carnival the whole world is beautiful, even the ugly ones.
How many good memories related to this holiday, during which everyone, adults and children, seeks original and unique, but also traditional ways of dressing up, to participate in the most colorful and cheerful party of the year. Among confetti, typical dishes, tricks, the great protagonists are above all the masks. We want to show you some methods for make your own Carnival mask at home. Here are some DIY jobs do it yourself, to do with the little ones, to give importance to this Carnival 2021, although less festive.
Read also: Home work in February: 10 small ideas to copy
Making DIY Carnival masks: many ideas
Let’s arm ourselves with scissors, fabric, cardboard, colors and glitter and let’s get to work for create the most colorful and imaginative Carnival masks hand made.
Making a DIY Unicorn Mask
The trend of the moment, loved by all little girls, it is definitely the Unicorn. Fantastic, magical and mysterious animal, he has become one of the most desired subjects. To realize a unicorn themed carnival mask we will need:
- Scissors;
- Glue;
- A mask prefabricated white, to decorate;
- Felt tip pen indelible golden;
- Glitter;
- Felt felt white and pink;
- Wool threads or colored cotton;
- A piece of EVA rubber pink;
- A elastic thread.
The procedure is simple:
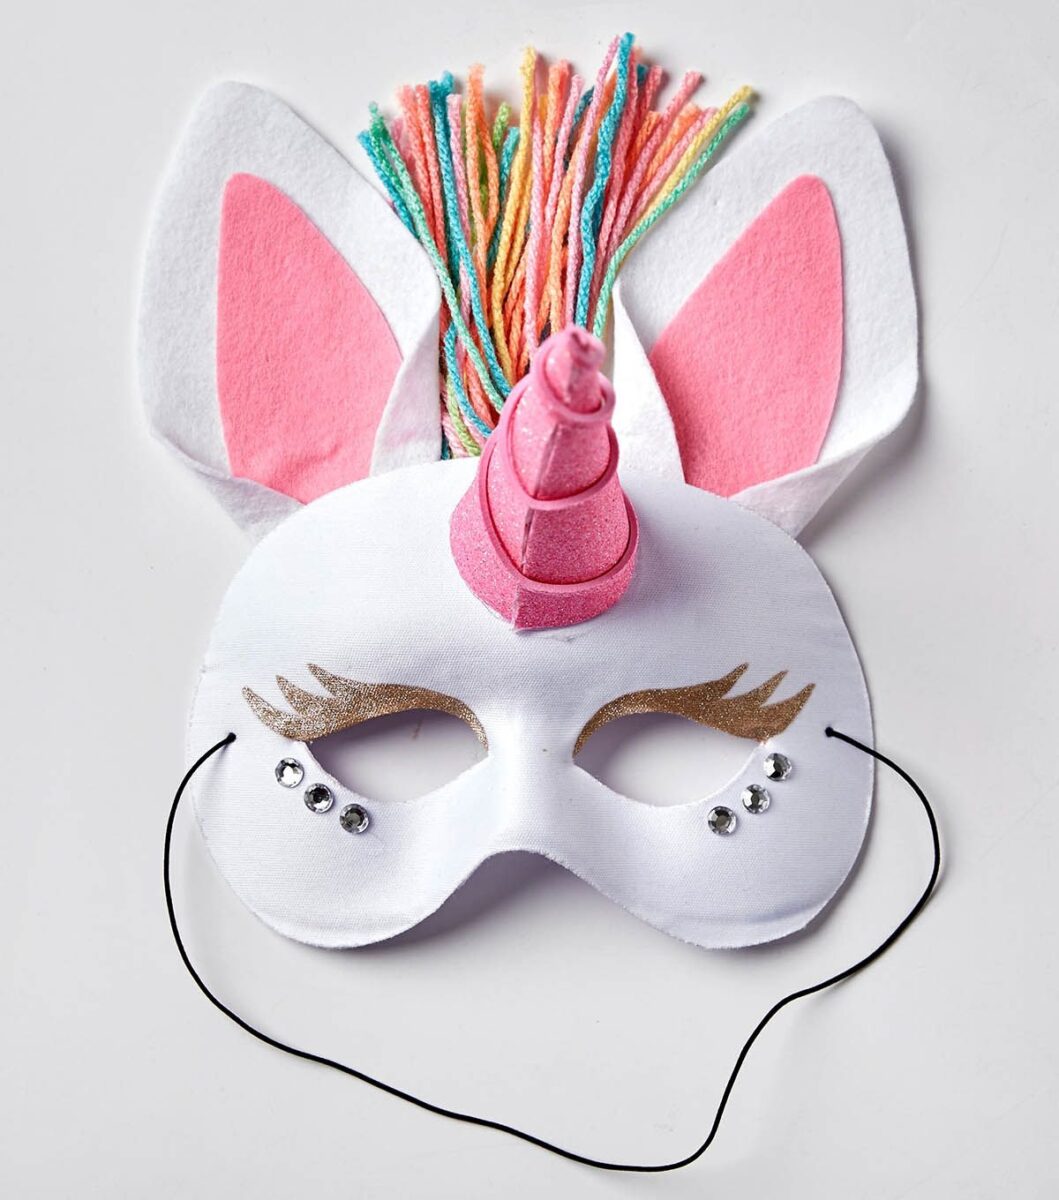
- We use the white mask to decorate as a base and we proceed with theglue the glitter to the sides of the eyes, in the part below the hole.
- With the marker indelible, let’s draw eyelashes, contouring the hole for the eyes.
- Let’s move on to EVA rubber, from which we will go to cut out the shape of a triangle about 10 cm high and 20 at the base. Let’s roll it up to form the horn and glue it on the face of the mask.
- Let’s now turn to the ears. We cut out the larger silhouette with white felt, and the smaller one with the pink felt. We glue the pink part on the white one and fix everything to the mask, with glue.
- With colored threads woolen or cotton we make the mane, fixing it on the back of the mask, at the forehead.
- We finish it all by passing the elastic thread in the holes of the mask.
A quick and easy project.
You may be interested in: Decorating your home for carnival
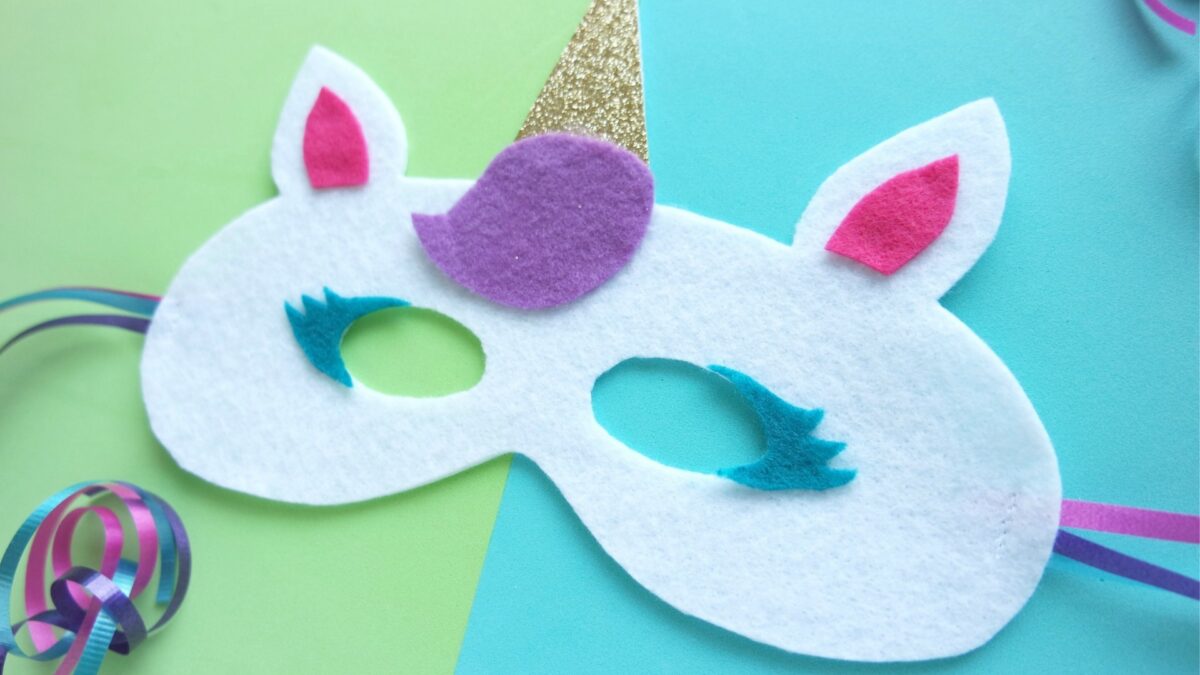
If you can’t get the pre-made cardboard mask, alternatively, you can make the mask entirely in felt, gluing on the white shape all the details you prefer. Here is an explanatory image.
DIY masks for Carnival: animals
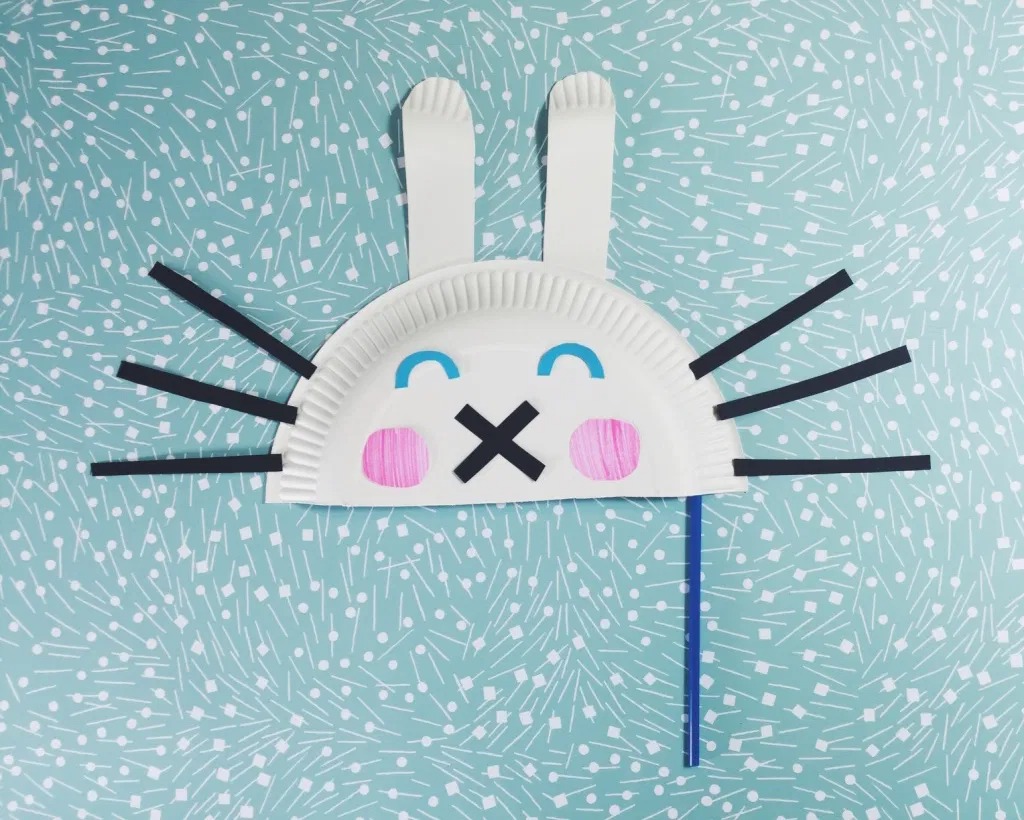
A second project that is as easy as it is creative and that, above all, children will love. We are going to make the animal themed Carnival masks, with the use of paper plates.
- Cardboard plates whites;
- Markers (or alternatively acrylic colors and brushes);
- Scissors;
- Glue;
- Straws.
Let’s now see the procedure.
- The first step is the cut the cardboard plates in half, following the diameter. From each dish, therefore, we will obtain two masks.
- At this point we cut out the holes for the eyes.
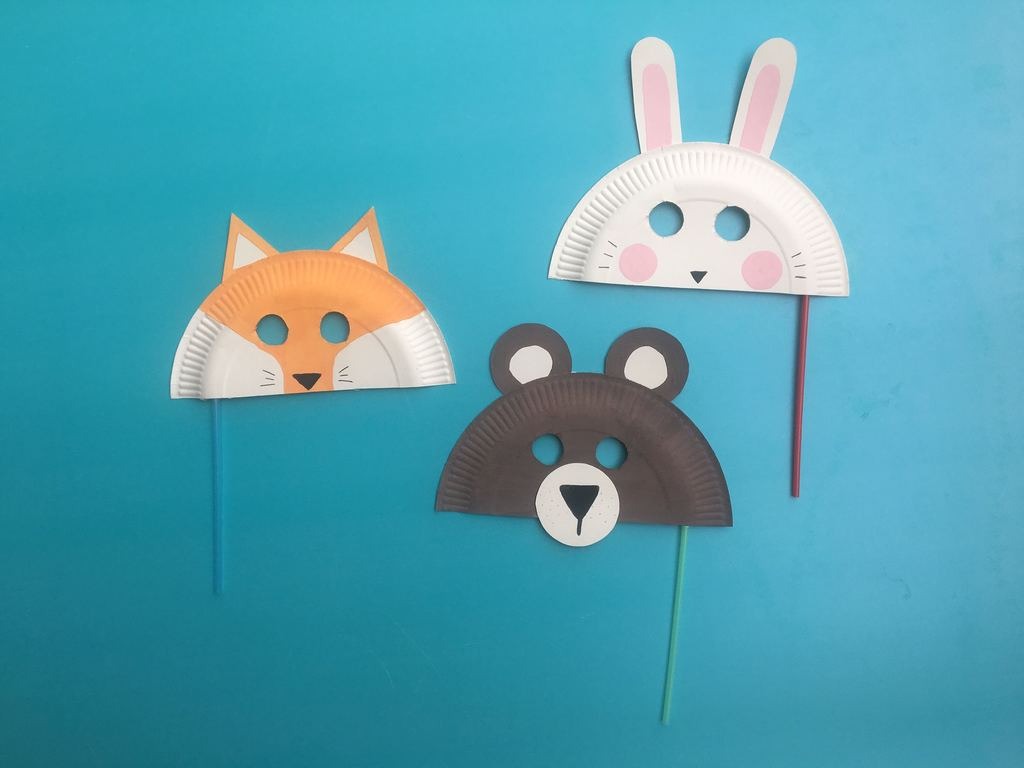
- Let’s proceed with the coloring the masks following the suggested image. You can create a bear, a rabbit or a fox or whatever the imagination suggests.
- Add some details with glue, like the ears and snouts.
- Glue the straw on one of the back sides of the mask, to allow the child to hold it.
Et voila, said done. In a few minutes your masks are ready.
DIY masks for Carnival: superheroes
Who doesn’t dream of being a superhero? At Carnival we are allowed to be whatever we want and this is the tutorial for make easy and colorful superhero themed masks. You will need:
- EVA rubber of various colors (green, black, red, yellow)
- Scissors;
- Glue;
- A black marker indelible with a thin tip;
- Elastic thread.
And here’s the procedure:
- Let’s proceed immediately with the cut out the typical shape of a mask from the EVA rubber, with holes for the eyes and smaller holes on the sides, for the passage of the elastic thread.
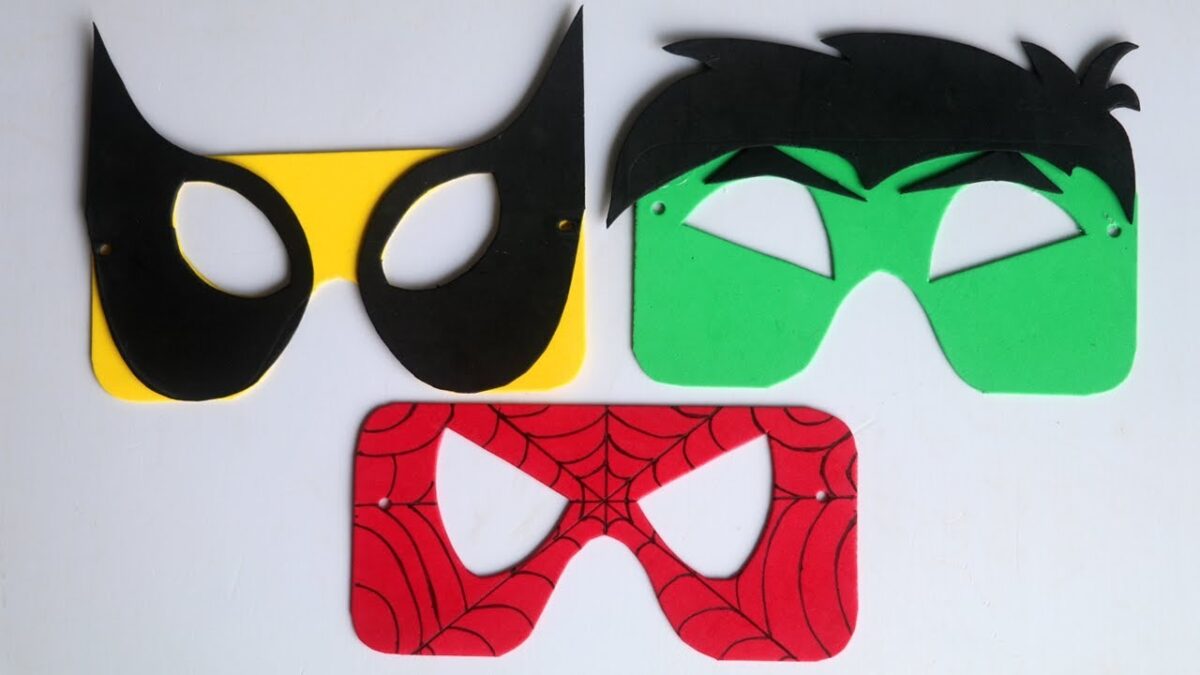
- The red mask, which represents Spiderman, it will have to be decorated with the marker, creating cobwebs that start from the center of the eyes, and spread out towards the outer perimeter.
- To represent Hulk, glue some big black eyebrows over the eyes and a black tuft Eva rubber.
- Continue like this with all the other superheroes, using with the EVA rubber copying the most evident traits of the character.
- Conclude inserting the elastic thread in the little holes.
- Your kids are ready to unleash their super powers.
How to make DIY carnival masks: pictures and photos
Here are some simple ideas to make DIY Carnival masks, together with the children. Spend some fun moments with them, taking inspiration from these images and trying to replicate all the projects. Good job.
How to make DIY Carnival masks with your children: necessary, procedures and models of masks, including unicorns, animals and superheroes. Let’s see how to do it.


The February 16, 2021 is the day of Carnival, a traditional festival full of folklore, loved by young and old. For the first time we should give up the celebrations in a big way, however we can give a touch of color to the day realizing the DIY carnival masks.
A sentence from Nikolaj Evreinov says: at carnival the whole world is young, even the old ones. At carnival the whole world is beautiful, even the ugly ones.
How many good memories related to this holiday, during which everyone, adults and children, seeks original and unique, but also traditional ways of dressing up, to participate in the most colorful and cheerful party of the year. Among confetti, typical dishes, tricks, the great protagonists are above all the masks. We want to show you some methods for make your own Carnival mask at home. Here are some DIY jobs do it yourself, to do with the little ones, to give importance to this Carnival 2021, although less festive.
Read also: Home work in February: 10 small ideas to copy

Making DIY Carnival masks: many ideas
Let’s arm ourselves with scissors, fabric, cardboard, colors and glitter and let’s get to work for create the most colorful and imaginative Carnival masks hand made.

Making a DIY Unicorn Mask
The trend of the moment, loved by all little girls, it is definitely the Unicorn. Fantastic, magical and mysterious animal, he has become one of the most desired subjects. To realize a unicorn themed carnival mask we will need:
- Scissors;
- Glue;
- A mask prefabricated white, to decorate;
- Felt tip pen indelible golden;
- Glitter;
- Felt felt white and pink;
- Wool threads or colored cotton;
- A piece of EVA rubber pink;
- A elastic thread.
The procedure is simple:
- We use the white mask to decorate as a base and we proceed with theglue the glitter to the sides of the eyes, in the part below the hole.
- With the marker indelible, let’s draw eyelashes, contouring the hole for the eyes.
- Let’s move on to EVA rubber, from which we will go to cut out the shape of a triangle about 10 cm high and 20 at the base. Let’s roll it up to form the horn and glue it on the face of the mask.
- Let’s now turn to the ears. We cut out the larger silhouette with white felt, and the smaller one with the pink felt. We glue the pink part on the white one and fix everything to the mask, with glue.
- With colored threads woolen or cotton we make the mane, fixing it on the back of the mask, at the forehead.
- We finish it all by passing the elastic thread in the holes of the mask.
A quick and easy project.
You may be interested in: Decorating your home for carnival

If you can’t get the pre-made cardboard mask, alternatively, you can make the mask entirely in felt, gluing on the white shape all the details you prefer. Here is an explanatory image.

DIY masks for Carnival: animals
A second project that is as easy as it is creative and that, above all, children will love. We are going to make the animal themed Carnival masks, with the use of paper plates.
- Cardboard plates whites;
- Markers (or alternatively acrylic colors and brushes);
- Scissors;
- Glue;
- Straws.
Let’s now see the procedure.
- The first step is the cut the cardboard plates in half, following the diameter. From each dish, therefore, we will obtain two masks.
- At this point we cut out the holes for the eyes.
- Let’s proceed with the coloring the masks following the suggested image. You can create a bear, a rabbit or a fox or whatever the imagination suggests.
- Add some details with glue, like the ears and snouts.
- Glue the straw on one of the back sides of the mask, to allow the child to hold it.
Et voila, said done. In a few minutes your masks are ready.

DIY masks for Carnival: superheroes
Who doesn’t dream of being a superhero? At Carnival we are allowed to be whatever we want and this is the tutorial for make easy and colorful superhero themed masks. You will need:
- EVA rubber of various colors (green, black, red, yellow)
- Scissors;
- Glue;
- A black marker indelible with a thin tip;
- Elastic thread.
And here’s the procedure:
- Let’s proceed immediately with the cut out the typical shape of a mask from the EVA rubber, with holes for the eyes and smaller holes on the sides, for the passage of the elastic thread.
- The red mask, which represents Spiderman, it will have to be decorated with the marker, creating cobwebs that start from the center of the eyes, and spread out towards the outer perimeter.
- To represent Hulk, glue some big black eyebrows over the eyes and a black tuft Eva rubber.
- Continue like this with all the other superheroes, using with the EVA rubber copying the most evident traits of the character.
- Conclude inserting the elastic thread in the little holes.
- Your kids are ready to unleash their super powers.

How to make DIY carnival masks: pictures and photos
Here are some simple ideas to make DIY Carnival masks, together with the children. Spend some fun moments with them, taking inspiration from these images and trying to replicate all the projects. Good job.

