Mysterious but at the same time reassuring: dream catchers have many hidden meanings and can be made at home.

L’dream catcher is an object that goes back at native tribe of the North America which, however, gave it a very different meaning. In fact, according to their tradition, the dream catcher served a symbolize there skill of an man in a specific area, such as an excellent hunter.
Only later was it given the meaning we know today, mysterious and magical. In any case, it is always a very nice piece of furniture to have at home and here’s how you can build it without buying it.
What you need: necessary materials
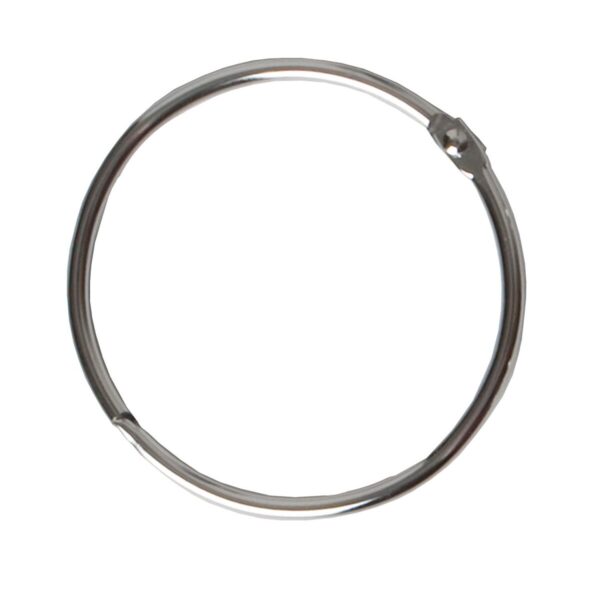
Before starting to build the dream catcher, it is good to check that you have everything you need to make it. Starting from the skeleton of this magical instrument, it will be necessary to have a circle metallic, purchasable in haberdashery.
Read also: DIY shelves
Small tip: if you have very large earrings in the shape of a circle, those are fine too.
Then, a faux leather ribbon – if you can’t find it, a satin ribbon is fine even if it won’t have the same tribal effect. You will also need a cotton thread you hate linen quite often. The number of threads will also depend on the weaves you want to make on the dream catcher.
If you are not too experienced, however, it would be better to limit yourself to a few threads so as not to create an unnecessary tangle of threads.
For decorations, space a pearls and beads, but also feathers and any element can help you to customize it in the way you prefer. For example, some pebbles to be attached with hot glue or in any case a glue that is fast enough to solidify.
The advantage of building a DIY dream catcher is precisely that of give it the character that we prefer, also depending on the wall or the bed where we will place it. Try, in any case, to maintain a certain chromatic consistency, avoiding too bright colors or “highlighters” that certainly do not recall anything too natural.

Work on the circle
As a first step to work on, you will need to make and decorate the metal circle. You have two ways to go: you could fasten the tape securely of faux leather on one part of the circle and start rolling it until you reach the beginning again. In this case you will fix it with a tight knot.
To avoid, however, that the tape gradually melts or gets tangled on one side, since the metal circle is slippery, you could opt for the use of the hot glue, which will perfectly fix the tape.
It may interest you: 10 DIY tricks to improve the kitchen
Once you have made the rolled base around the perimeter of the circle, it’s time to move on to the wool or cotton threads that will form the center of the circle. By fixing the knot on one part of the circle, you can get started build the weave of the threads, bringing them from side to side for the central cobweb.

Always make small knots when you intend change direction and you want to create the straight line to go from one side to the other.
Be very careful to make the knots, so from build a solid foundation. Continue to weave until you reach the center of the circle, where you will cut off the excess thread.
If you want, you can already start inserting the beads and pebbles inside the ring, but be careful not to weigh it down. This area, in fact, must still be “light” enough to recall the lightness and freedom of the air.
Do you want design advice on how to furnish? Join the group
Be careful to always keep the thread taut you work with, especially when making knots. A good method would be to hold a very small ball of yarn as you lay it out, instead of keeping the yarn loose and loose.

Enrich the dream catcher
After you’ve worked on the dream catcher center, it’s time to work on the rest to make it even more beautiful.
You can decide to do get off gods cotton threads or any other natural material from the base of the circle, in such a way as to give even more lightness to the dream catcher.
Undoubtedly, it is a good time to hang up also the feathers that will enrich this tool. You can do this by attaching them directly to the base or by letting them fall from the threads you attached previously.
You can decide to decorate a single whole strand with beads and gems, so as to differentiate it from the others.
Or finally, you might hang on each thread of the different feathers, giving it an even more natural look.
In short, at this juncture you can make room for your creativity: on the other hand, your dreams will be “caught”.

Final touches
Before considering the dream catcher finished, it is useful check them there stability. By carefully and gently touching the inner strands, make sure that the knots do not untie but are well secured.
To hang the dream catcher, you can use the same faux leather thread you used for create a loop to be placed on the highest end of the circle. In doing so you will hang it where you want, even to the headrest of the bed or a nail on the wall.
The dream catcher also goes perfectly with a bohemian-style home, so you can place it wherever you like, even in the living room.

How to build a dream catcher: photos and pictures
To get some other interesting ideas on your personalized dream catcher, you can browse the gallery of images.
Mysterious but at the same time reassuring: dream catchers have many hidden meanings and can be made at home.

L’dream catcher is an object that goes back at native tribe of the North America which, however, gave it a very different meaning. In fact, according to their tradition, the dream catcher served a symbolize there skill of an man in a specific area, such as an excellent hunter.
Only later was it given the meaning we know today, mysterious and magical. In any case, it is always a very nice piece of furniture to have at home and here’s how you can build it without buying it.
What you need: necessary materials
Before starting to build the dream catcher, it is good to check that you have everything you need to make it. Starting from the skeleton of this magical instrument, it will be necessary to have a circle metallic, purchasable in haberdashery.
Read also: DIY shelves
Small tip: if you have very large earrings in the shape of a circle, those are fine too.
Then, a faux leather ribbon – if you can’t find it, a satin ribbon is fine even if it won’t have the same tribal effect. You will also need a cotton thread you hate linen quite often. The number of threads will also depend on the weaves you want to make on the dream catcher.
If you are not too experienced, however, it would be better to limit yourself to a few threads so as not to create an unnecessary tangle of threads.
For decorations, space a pearls and beads, but also feathers and any element can help you to customize it in the way you prefer. For example, some pebbles to be attached with hot glue or in any case a glue that is fast enough to solidify.
The advantage of building a DIY dream catcher is precisely that of give it the character that we prefer, also depending on the wall or the bed where we will place it. Try, in any case, to maintain a certain chromatic consistency, avoiding too bright colors or “highlighters” that certainly do not recall anything too natural.

Work on the circle
As a first step to work on, you will need to make and decorate the metal circle. You have two ways to go: you could fasten the tape securely of faux leather on one part of the circle and start rolling it until you reach the beginning again. In this case you will fix it with a tight knot.
To avoid, however, that the tape gradually melts or gets tangled on one side, since the metal circle is slippery, you could opt for the use of the hot glue, which will perfectly fix the tape.
It may interest you: 10 DIY tricks to improve the kitchen
Once you have made the rolled base around the perimeter of the circle, it’s time to move on to the wool or cotton threads that will form the center of the circle. By fixing the knot on one part of the circle, you can get started build the weave of the threads, bringing them from side to side for the central cobweb.

Always make small knots when you intend change direction and you want to create the straight line to go from one side to the other.
Be very careful to make the knots, so from build a solid foundation. Continue to weave until you reach the center of the circle, where you will cut off the excess thread.
If you want, you can already start inserting the beads and pebbles inside the ring, but be careful not to weigh it down. This area, in fact, must still be “light” enough to recall the lightness and freedom of the air.
Do you want design advice on how to furnish? Join the group
Be careful to always keep the thread taut you work with, especially when making knots. A good method would be to hold a very small ball of yarn as you lay it out, instead of keeping the yarn loose and loose.

Enrich the dream catcher
After you’ve worked on the dream catcher center, it’s time to work on the rest to make it even more beautiful.
You can decide to do get off gods cotton threads or any other natural material from the base of the circle, in such a way as to give even more lightness to the dream catcher.
Undoubtedly, it is a good time to hang up also the feathers that will enrich this tool. You can do this by attaching them directly to the base or by letting them fall from the threads you attached previously.
You can decide to decorate a single whole strand with beads and gems, so as to differentiate it from the others.
Or finally, you might hang on each thread of the different feathers, giving it an even more natural look.
In short, at this juncture you can make room for your creativity: on the other hand, your dreams will be “caught”.

Final touches
Before considering the dream catcher finished, it is useful check them there stability. By carefully and gently touching the inner strands, make sure that the knots do not untie but are well secured.
To hang the dream catcher, you can use the same faux leather thread you used for create a loop to be placed on the highest end of the circle. In doing so you will hang it where you want, even to the headrest of the bed or a nail on the wall.
The dream catcher also goes perfectly with a bohemian-style home, so you can place it wherever you like, even in the living room.

How to build a dream catcher: photos and pictures
To get some other interesting ideas on your personalized dream catcher, you can browse the gallery of images.


