The DIY nativity scene, starting from objects and materials in their second life, recycled. Ideas on how to transform, images to visualize a suggestive nativity scene, even if created starting from a few simple elements. An excursus on how to create the setting of the nativity scene.
Prepare DIY nativity scenes, joining there healthy passion for creative recycling to the magic of the party most heartfelt of the year, Christmas. Ideas to ensure that the imagination takes off and creativity comes to animate the hands.
Relaxing on Sundays waiting for Christmas, alone or in the company of the little ones of the house, beginning to teach them the value to be given to the planet Earth, thanks to recycling.
How transform a material of packging destined for landfill in a base from which to start cribs do-it-yourself. The setting must be thought out and implemented one step at a time, with attention to detail, but without letting oneself be conditioned by an excessive search for realism.
Read also: DIY cardboard nativity scene: how to make it easily
Waiting for Christmas with DIY
A nice time, that preceding Christmas, to spend with loved ones a decorate the house. For everyone, even those who do not have a fervent faith all year round, Christmas is the holiday that cannot be renounced.
In creativity of doing, of building, even if in an amateur way, we leave the mark of our best intentions. We combine to this too an ecological soul, which is well suited to the Christmas spirit and we will have a very respectable combination.
Among the many decorations that can be made with recycled materials we have selected of the ideas as a starting point for simple DIY nativity scenes, but much originals. Small objects that can relive in the representation of the symbol of spiritual rebirth, Christmas in fact.
Ideas: the DIY nativity scene project
Many of the decorations realized they start from an idea and in progress they transform, because creativity expands enormously when we have our hands in action. Then let’s get the small tools to work, we set up a worktop, taking care to preserve the surface from glues and cuts and we begin to build our projects.
Prepare yours work corner with all the material but get ready to new shipments in drawers at home, among the fabrics and sewing in search of strings to tie dresses or make hair and hats.
You may be interested in: Decorating your home for a party with recycled items
A tin cap becomes the base on which the men rest, or their face, in short not stay at seek realism, we leave that to the purchased cribs, us let’s have fun to play with what we have, as a child would.
Recycling education
If there are gods in the house children do not miss anoccasion like this to make them understand the value of recycling and you begin to teach them, with actions commensurate to their age, of course, the use of polished and the magic of adhesives.
Let’s say in the Christmas period the houses seem empty without a crib, however small it may be and, even if you have one well composed at home, some references in the other rooms can only make the atmosphere more welcoming.
Do you want design advice on how to furnish? Join the group
Those accustomed to recycling recognize all that at a glance packaging material that arrives in the house and that it is worth to keep for reuse. For all the others to follow you will find clarifications on what can be used and what can become.
The containers for the setting
The cardboard cut out becomes very useful for the small elements of the nativity scene, but the advice we give you is to use the boxes entirely, adding them to each other you will do develop in height the crib, where there is little space at the base. With the nativity scene above, on the top floor of your reconstruction and all the areas you want to create in addition, as in traditional nativity scenes.
The shoe boxes they have a good cardboard and with a good cutter you can also puncture them in some points to make vegetation come out.
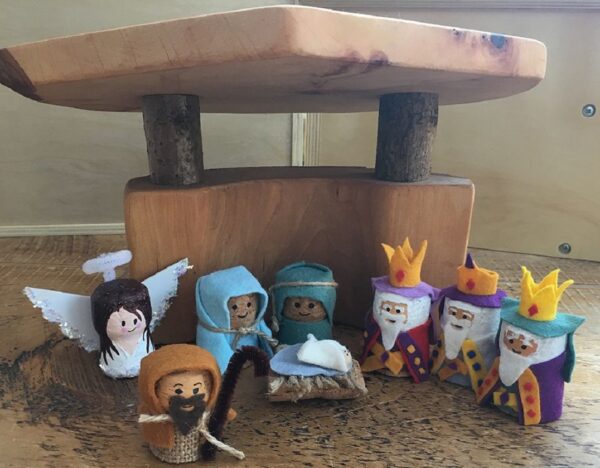
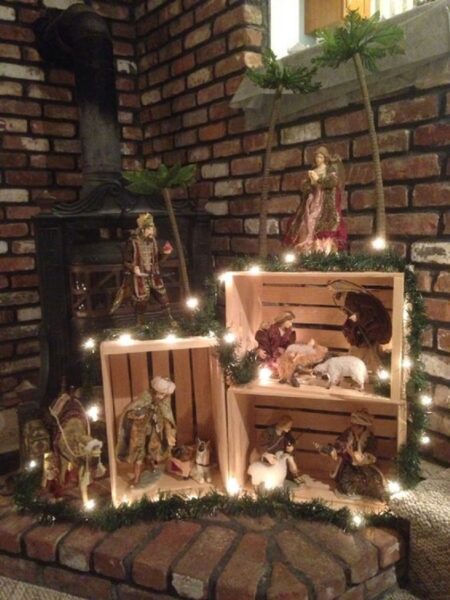
The wooden boxes then they are very suggestive already on their own. A coat of white paint for a shabby crib, then completing with characters dressed in laces and pastel colors.
Not just cardboard
What will make your crib unique will also be many other materials you have at home, which cannot be counted all.
Of the shingles left over from the reconstruction of the roof use them to build the setting of the nativity scene and then insert the characters inside.
An old picture book gives you the images of the nativity to glue to the tiles that you are going to insert vertically in the composition, for a large nativity scene and of great presence, if anything to be settled in the garden with a clear varnish protection.
The polystyrene lends itself just as well, a cutter and hot glue and we can obtain loops and caves by digging in the depth of the package walls. Let them be whole houses, that’s enough to open some holes for the windows and if anything tilt the roof, cutting it obliquely at the top.
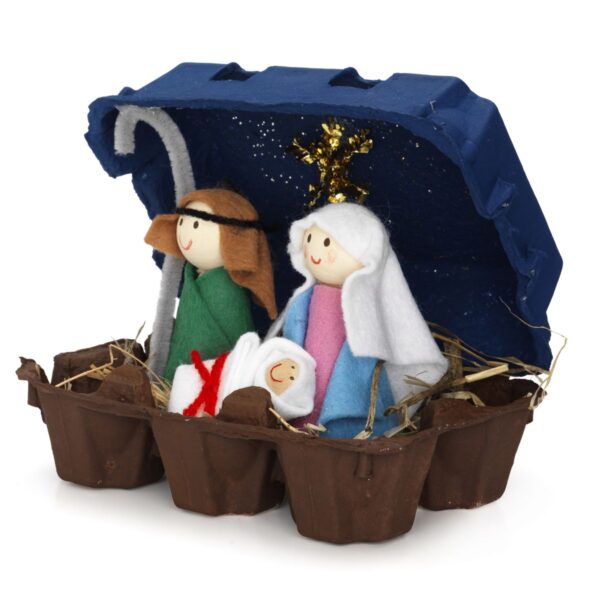
A separate mention, among the unthinkable materials for fascinating settings, egg boxes, those in cardboard better than the others, because they are easier to decorate with brushes. Leave the box open, paint the two parts with different colors and inside the niches, for each of them, arranged the three salient figures of the nativity scene. Pieces of fabric glued here and will complete it with taste.
Details in the DIY nativity scene
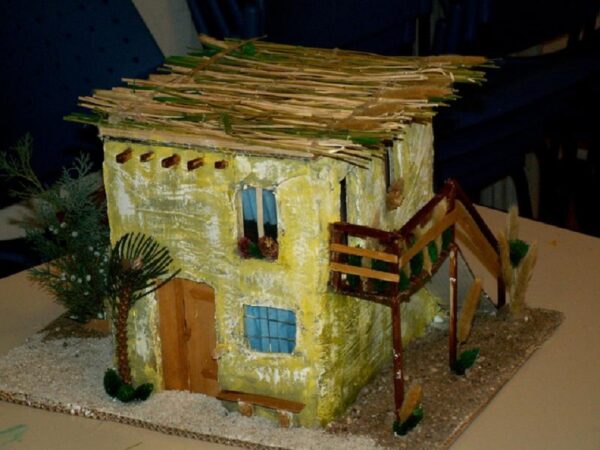
The carton of boxes has no equal for building nativity houses. Cut the various sides of the box to make the surfaces easy to maneuver. Pencil for drawing and cutter handy. To build three-dimensional miniatures remember that flaps must be left between one facade and the other to glue them together.
Also tin cans, those of peeled tomatoes, to give shape to fountains or mangers very indicated in the Neapolitan-inspired nativity scene.
THE glass jars instead, duly equipped with candles inside and positioned to the sides of the whole scene of the nativity, to create a light and shadow effect, capable of moving and overshadowing imperfections.

The characters: unusual assemblages
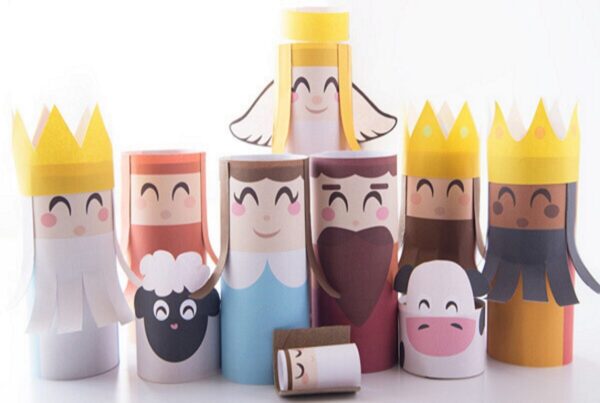
THE jars of yogurt, especially the drink packs that have one silhouette similar to the proportions of a body, they are very useful.
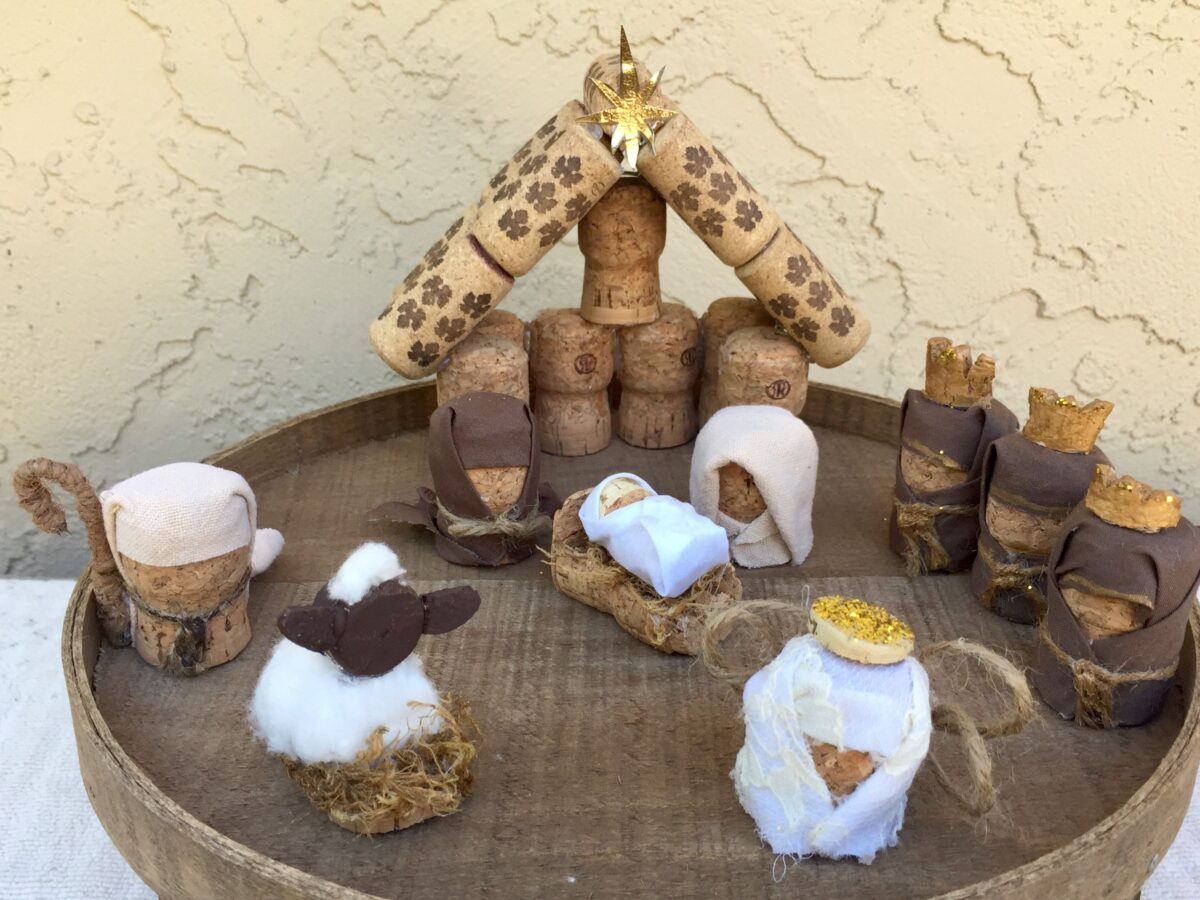
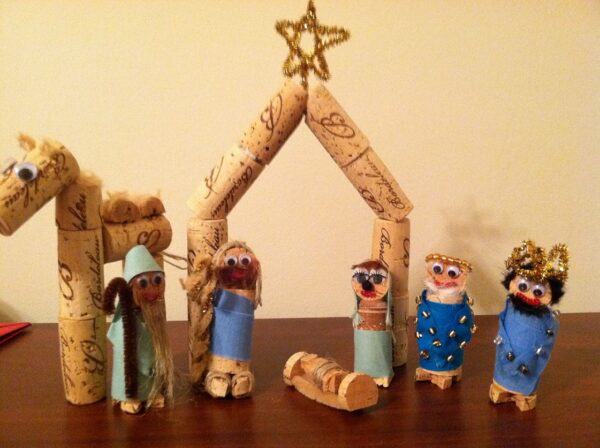
For our little men i corks bottles with bubbles, where the large head effortlessly becomes a face. If you want taller characters, glue them to other corks, of the cylindrical ones and do not worry about the diameters that do not coincide, because i pieces of cloth clothes they cover entire bodies.

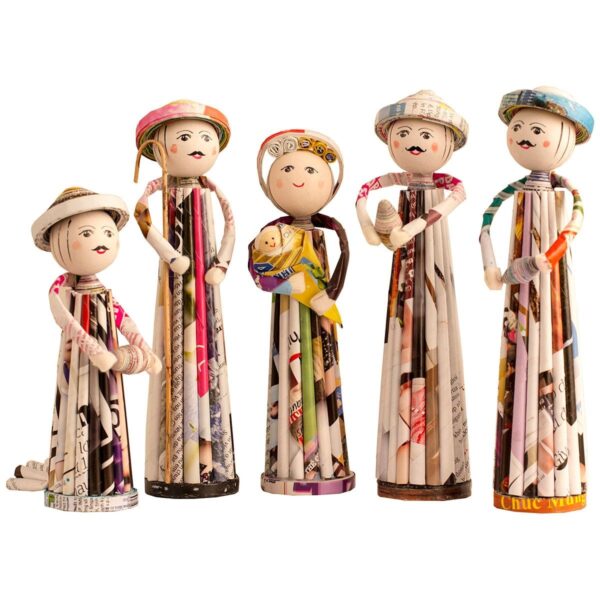
Old balls that you no longer use are the heads of the your characters, glued on cardboard rolls, on the cones of recycled paper, they lend themselves to being first covered with wet paper and vinyl glue and, once dried, decorated to make faces, complete with eyes and mouth.
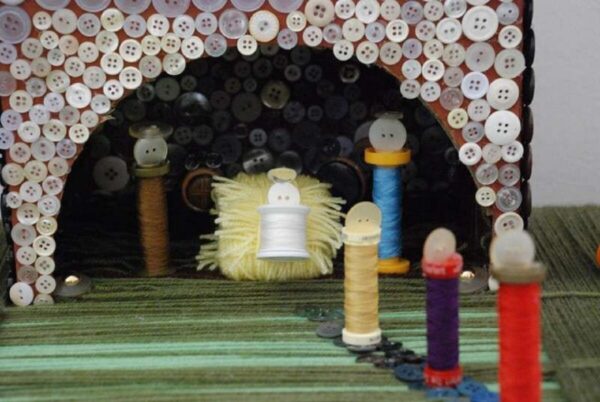
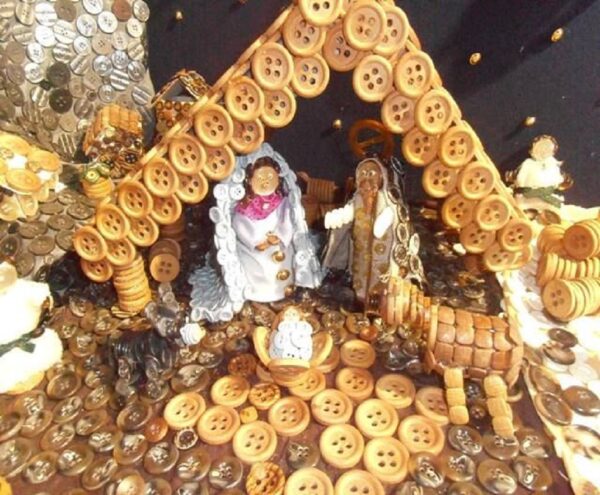
Even a big button becomes a face if you don’t find anything better, and then you discover the decorative power of the gods buttons all too in setting crib.
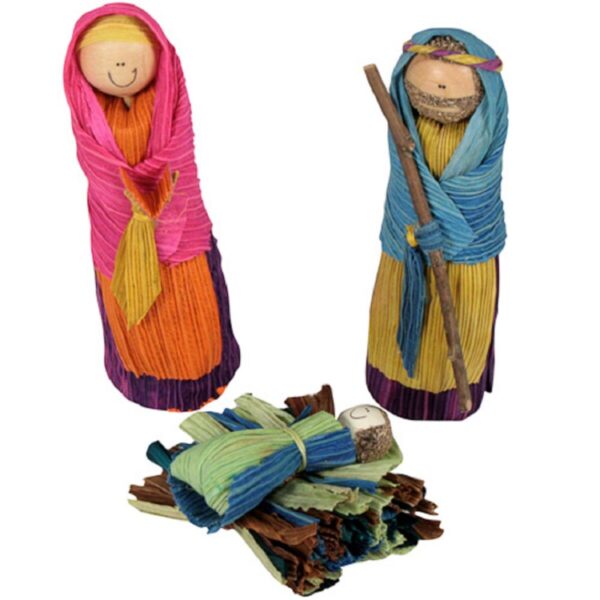
The pine cones that you have collected or those among the old decorations glue them on a basis, with hot glue to begin with. A spherical object to act as a head, it doesn’t matter if you add the ed details or not a small piece of jute or other fabric that starts from the top of the head to go down on the shoulders, like a cloak, with a tight drawstring at the neck, to give it the shape of a hood around the head.
All the one that does not stand up, fix it on a base, a jam tin lid or, failing that, cut one out of a cardboard box. On the other hand, even the characters of our purchased nativity scenes presented themselves with the basics so as not to fall continuously.
DIY nativity scene with recycled materials: photos and images
The crib it is the symbol of Christmas and, if we make it at home using gods materials that otherwise should be thrown away, with the techniques of do-it-yourself, we carry out an action with multiple consequences, all positive,: lend a hand to the planet and warm our homes.
The DIY nativity scene, starting from objects and materials in their second life, recycled. Ideas on how to transform, images to visualize a suggestive nativity scene, even if created starting from a few simple elements. An excursus on how to create the setting of the nativity scene.

Prepare DIY nativity scenes, joining there healthy passion for creative recycling to the magic of the party most heartfelt of the year, Christmas. Ideas to ensure that the imagination takes off and creativity comes to animate the hands.
Relaxing on Sundays waiting for Christmas, alone or in the company of the little ones of the house, beginning to teach them the value to be given to the planet Earth, thanks to recycling.
How transform a material of packging destined for landfill in a base from which to start cribs do-it-yourself. The setting must be thought out and implemented one step at a time, with attention to detail, but without letting oneself be conditioned by an excessive search for realism.
Read also: DIY cardboard nativity scene: how to make it easily

Waiting for Christmas with DIY
A nice time, that preceding Christmas, to spend with loved ones a decorate the house. For everyone, even those who do not have a fervent faith all year round, Christmas is the holiday that cannot be renounced.
In creativity of doing, of building, even if in an amateur way, we leave the mark of our best intentions. We combine to this too an ecological soul, which is well suited to the Christmas spirit and we will have a very respectable combination.
Among the many decorations that can be made with recycled materials we have selected of the ideas as a starting point for simple DIY nativity scenes, but much originals. Small objects that can relive in the representation of the symbol of spiritual rebirth, Christmas in fact.

Ideas: the DIY nativity scene project
Many of the decorations realized they start from an idea and in progress they transform, because creativity expands enormously when we have our hands in action. Then let’s get the small tools to work, we set up a worktop, taking care to preserve the surface from glues and cuts and we begin to build our projects.
Prepare yours work corner with all the material but get ready to new shipments in drawers at home, among the fabrics and sewing in search of strings to tie dresses or make hair and hats.
You may be interested in: Decorating your home for a party with recycled items
A tin cap becomes the base on which the men rest, or their face, in short not stay at seek realism, we leave that to the purchased cribs, us let’s have fun to play with what we have, as a child would.

Recycling education
If there are gods in the house children do not miss anoccasion like this to make them understand the value of recycling and you begin to teach them, with actions commensurate to their age, of course, the use of polished and the magic of adhesives.
Let’s say in the Christmas period the houses seem empty without a crib, however small it may be and, even if you have one well composed at home, some references in the other rooms can only make the atmosphere more welcoming.
Do you want design advice on how to furnish? Join the group
Those accustomed to recycling recognize all that at a glance packaging material that arrives in the house and that it is worth to keep for reuse. For all the others to follow you will find clarifications on what can be used and what can become.

The containers for the setting
The cardboard cut out becomes very useful for the small elements of the nativity scene, but the advice we give you is to use the boxes entirely, adding them to each other you will do develop in height the crib, where there is little space at the base. With the nativity scene above, on the top floor of your reconstruction and all the areas you want to create in addition, as in traditional nativity scenes.
The shoe boxes they have a good cardboard and with a good cutter you can also puncture them in some points to make vegetation come out.
The wooden boxes then they are very suggestive already on their own. A coat of white paint for a shabby crib, then completing with characters dressed in laces and pastel colors.

Not just cardboard
What will make your crib unique will also be many other materials you have at home, which cannot be counted all.
Of the shingles left over from the reconstruction of the roof use them to build the setting of the nativity scene and then insert the characters inside.
An old picture book gives you the images of the nativity to glue to the tiles that you are going to insert vertically in the composition, for a large nativity scene and of great presence, if anything to be settled in the garden with a clear varnish protection.

The polystyrene lends itself just as well, a cutter and hot glue and we can obtain loops and caves by digging in the depth of the package walls. Let them be whole houses, that’s enough to open some holes for the windows and if anything tilt the roof, cutting it obliquely at the top.
A separate mention, among the unthinkable materials for fascinating settings, egg boxes, those in cardboard better than the others, because they are easier to decorate with brushes. Leave the box open, paint the two parts with different colors and inside the niches, for each of them, arranged the three salient figures of the nativity scene. Pieces of fabric glued here and will complete it with taste.

Details in the DIY nativity scene
The carton of boxes has no equal for building nativity houses. Cut the various sides of the box to make the surfaces easy to maneuver. Pencil for drawing and cutter handy. To build three-dimensional miniatures remember that flaps must be left between one facade and the other to glue them together.
Also tin cans, those of peeled tomatoes, to give shape to fountains or mangers very indicated in the Neapolitan-inspired nativity scene.
THE glass jars instead, duly equipped with candles inside and positioned to the sides of the whole scene of the nativity, to create a light and shadow effect, capable of moving and overshadowing imperfections.

The characters: unusual assemblages
THE jars of yogurt, especially the drink packs that have one silhouette similar to the proportions of a body, they are very useful.
For our little men i corks bottles with bubbles, where the large head effortlessly becomes a face. If you want taller characters, glue them to other corks, of the cylindrical ones and do not worry about the diameters that do not coincide, because i pieces of cloth clothes they cover entire bodies.

Old balls that you no longer use are the heads of the your characters, glued on cardboard rolls, on the cones of recycled paper, they lend themselves to being first covered with wet paper and vinyl glue and, once dried, decorated to make faces, complete with eyes and mouth.
Even a big button becomes a face if you don’t find anything better, and then you discover the decorative power of the gods buttons all too in setting crib.

The pine cones that you have collected or those among the old decorations glue them on a basis, with hot glue to begin with. A spherical object to act as a head, it doesn’t matter if you add the ed details or not a small piece of jute or other fabric that starts from the top of the head to go down on the shoulders, like a cloak, with a tight drawstring at the neck, to give it the shape of a hood around the head.
All the one that does not stand up, fix it on a base, a jam tin lid or, failing that, cut one out of a cardboard box. On the other hand, even the characters of our purchased nativity scenes presented themselves with the basics so as not to fall continuously.

DIY nativity scene with recycled materials: photos and images
The crib it is the symbol of Christmas and, if we make it at home using gods materials that otherwise should be thrown away, with the techniques of do-it-yourself, we carry out an action with multiple consequences, all positive,: lend a hand to the planet and warm our homes.

