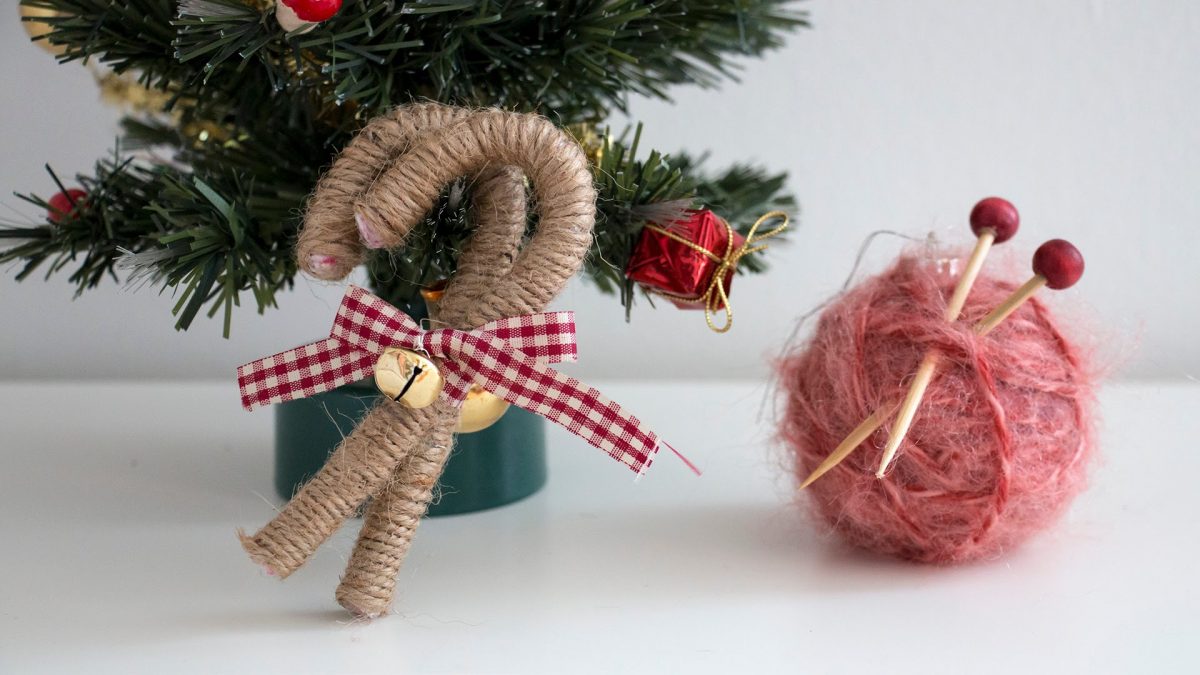
DIY Christmas balls: made of polystyrene, wool, with twine, with transparent glass, the decoupage technique and covered with fabric with the patchwork technique. Video tutorial to create beautiful and magical Christmas balls for the Christmas tree.
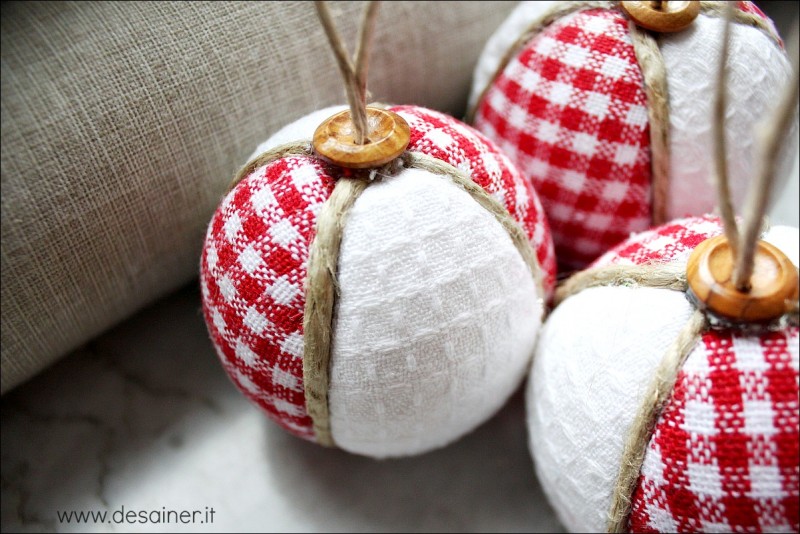
The Christmas is now upon us and for those who want to try their hand at do-it-yourself today we propose several ideas to make magnificent Christmas balls.
DIY fabric Christmas baubles
The procedure is very simple and fast, and the result of great effect, as you can see from the images.
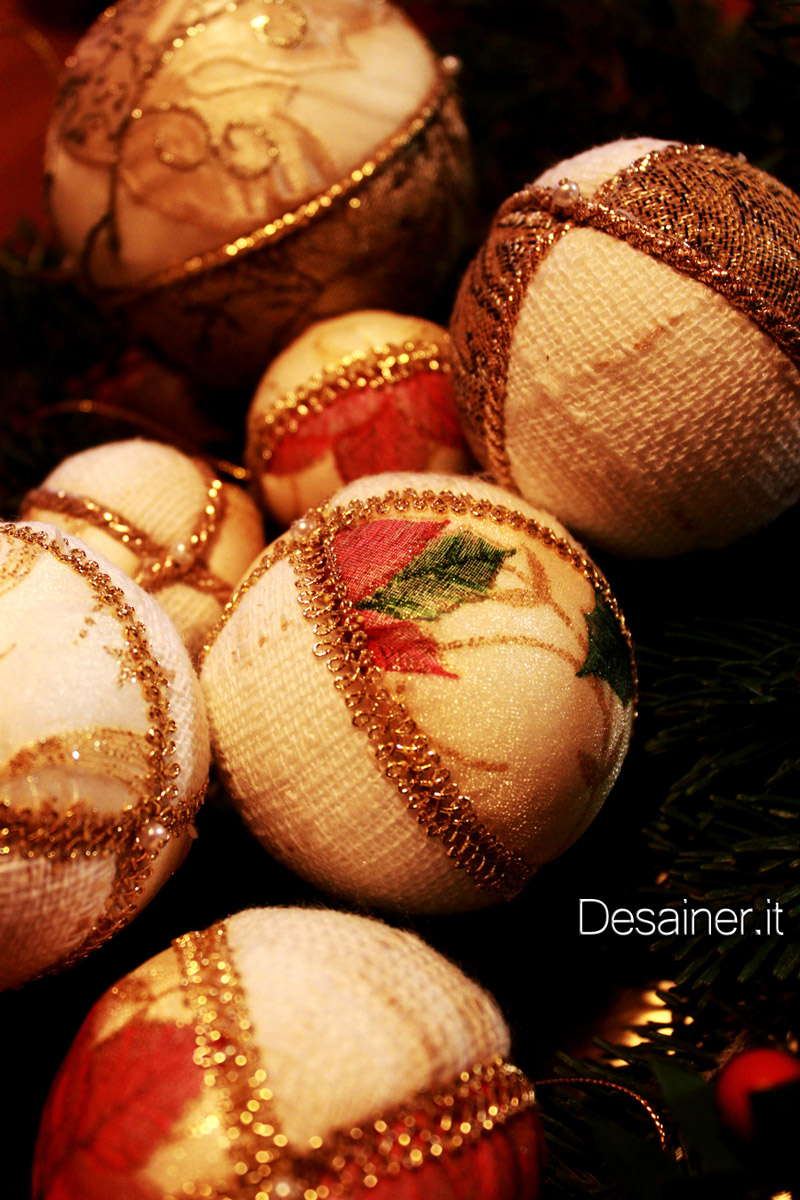
But let’s move on to what is needed to make this magnificent one christmas decoration.
Material
- polystyrene balls of various sizes;
- various fabrics (recycling centerpieces, shawls, Christmas ribbons);
- cords, ribbons;
- golden thread for hook;
- cutter;
- pins;
- beads;
- hot glue gun;
- nail file;
- felt tip pen;
- pen or pencil;
- baking paper;
- scissors.
Method
- Let’s dissect the polystyrene ball with the cutter, dividing it into 4 wedges. There slot it must be 1 cm deep.
- With a pen or a pencil we pierce theend of the ball, making a hole of about 3 cm (we will need it to introduce the hook) and facilitate the introduction of the fabrics into the corner.
- With a baking paper, resting on the ball, and a felt-tip pen, we obtain the shape of the wedges, which we will need to cut out the fabrics. (It is important, in the end, to cut the edges of the template 1-2 cm larger, as you have to consider the fabric to be inserted in the slots).
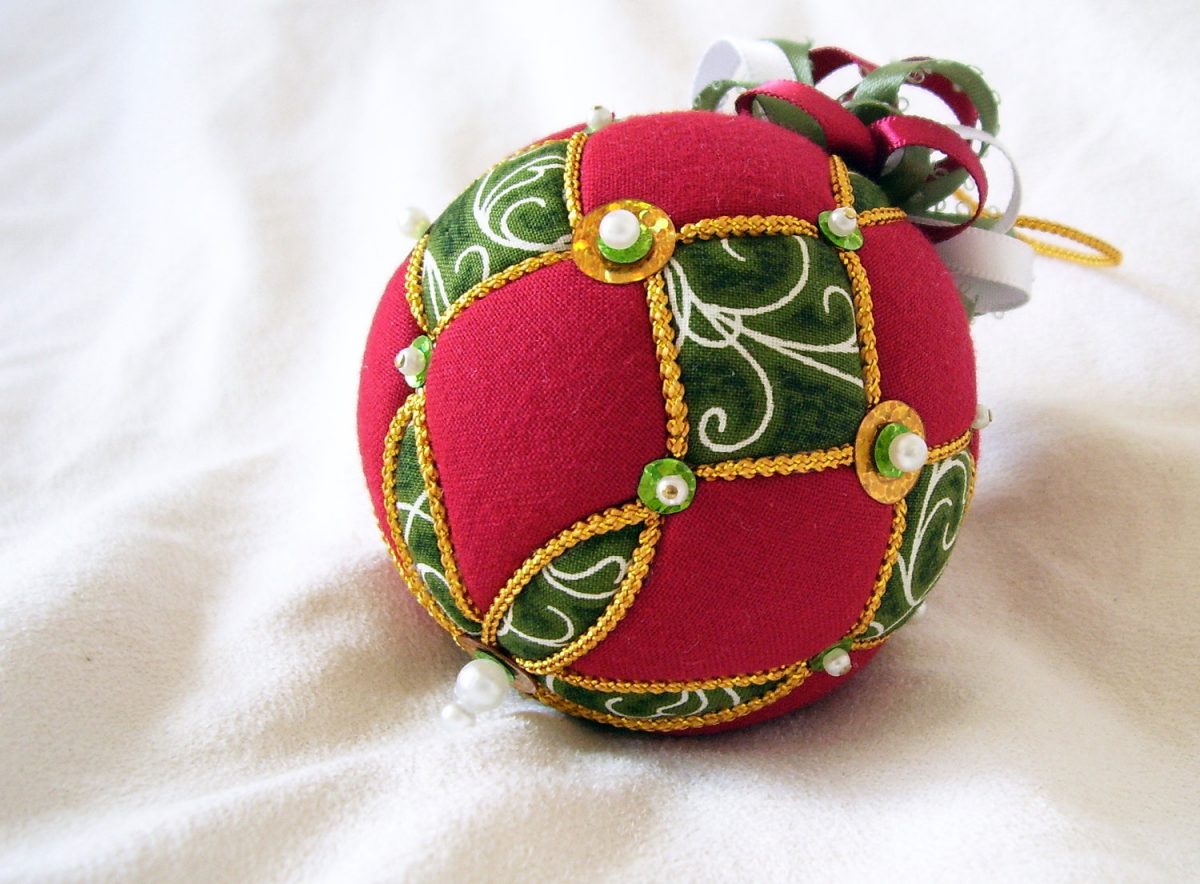
- Made the Shape, we place it on the chosen fabric and obtain i pieces of cloth. (A tip: stop the shape with a pin, it will be easier to proceed with the cutout). Now that we have our 4 bits of fabric we can proceed to the next step.
- We lay the piece of fabric on the first segment and help us with one lime for nails we insert the edges to theinside the slots.
- Let’s proceed alternating fabrics, as the video below shows, with the same mechanism. Eventually we will have ours ball covered entirely with fabric.
- Now let’s cut a golden thread of about 12 cm to accomplish the hook. We do a node with the two ends and insert the same inside one of the two ends of the ball, helping us with the lime. We stop the thread with one drop of hot glue.
- It’s time to wrap up the ribbon chosen (gilded and laced) on the creeks of the ball, which we will stop at both ends with two pins equipped with beads.
Read also: Furnishing your home with patchwork: ideas and useful tips
If you are unsure of the seal of the ribbon, you can apply a drop of hot glue to both ends or along its path (but be careful not to damage the fabrics!).
And finally our splendid ones fabric christmas balls they are ready!
DIY Fabric Christmas Balls Tutorial Video
Hand painted glass Christmas baubles
Very simple to be made, they are ideal for entertaining even your little ones. But let’s see what it takes to create these gorgeous ones christmas balls in glass.
Material
- glass balls
- brushes
- solvent
- colors for the glass (red and white)
- red wool
Method
Think of a subject to draw on ball and draw it Shape on a sheet.
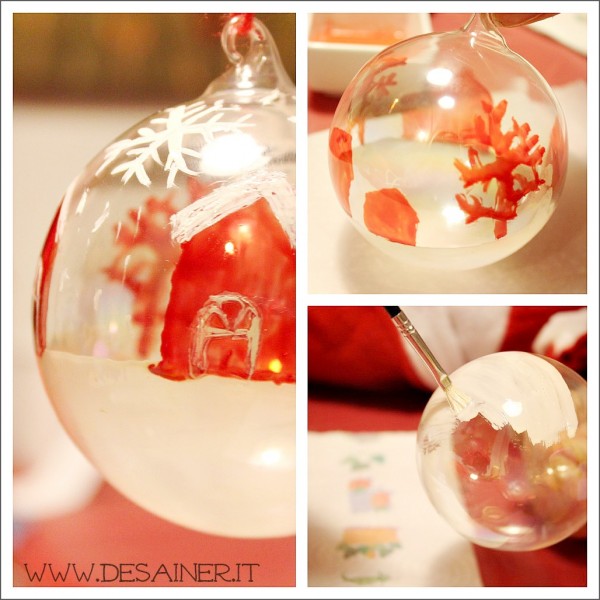
In our case, first, we have drawn down the snow, coloring of White 1/3 of the ball.
At this point we used the red to paint the silhouettes of little houses and of trees.
Then with the White we completed the work by drawing doors is windows at houses, the snow and the latest decorations on the trees.
Finally we realized with a wire of wool red the hook to hang the bauble on the Christmas tree.
You may be interested in: Christmas decorations with decoupage: wonderful ideas for beautifying your home
It was a lot of fun doing this job, and the result is great effect!
Video Tutorial DIY Glass Christmas Balls
Christmas baubles with DIY decoupage
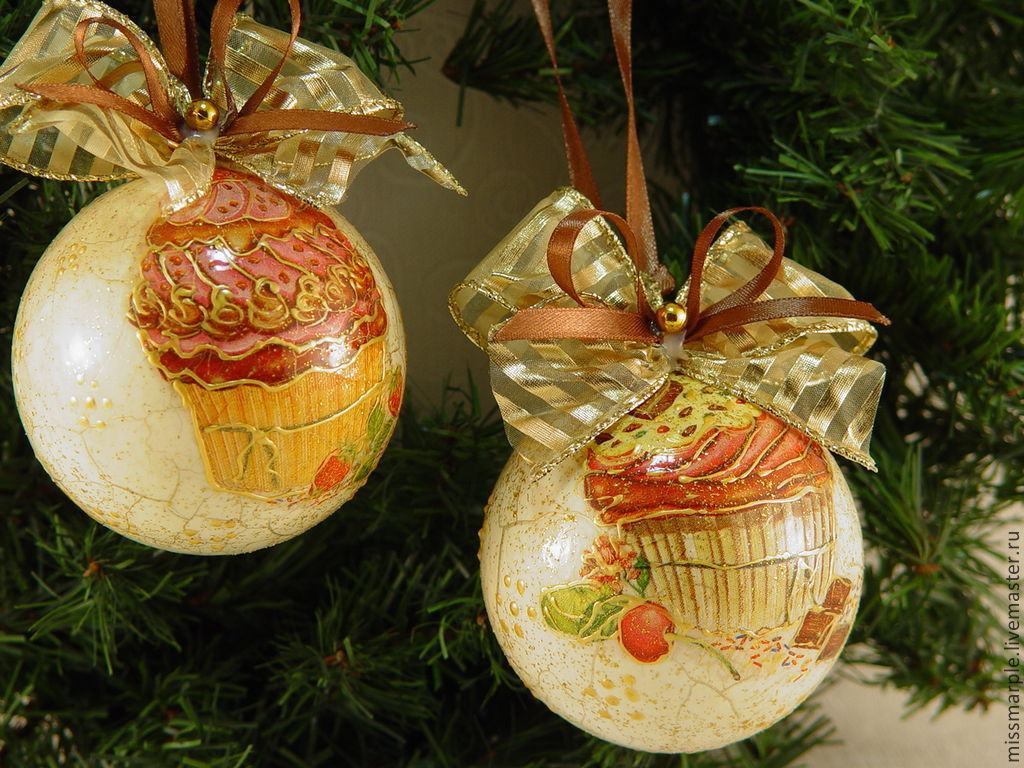
The technique of decoupage it is very simple and fun, because you can indulge yourself in the choice of subjects and can also be performed by children.
Materials
- decorative polystyrene balls
- napkins or decoupage paper
- brushes and sponges
- hot glue
- acrylic glue
- colored ribbons and wooden beads
- scissors
Method
But now let’s move on to the work, here are the steps to follow to make beautiful balls with decoupage.
Do you want design advice on how to furnish? Join the group
First we choose the subject we want to give to the ball, then we cut it out and then we cut out the image, to make sure that it can be applied easily on the spherical surface.
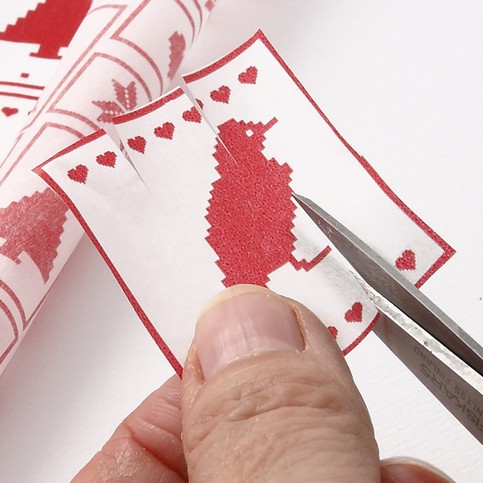
At this point the image can be applied to the ball using the special glue for decoupage (acrylic).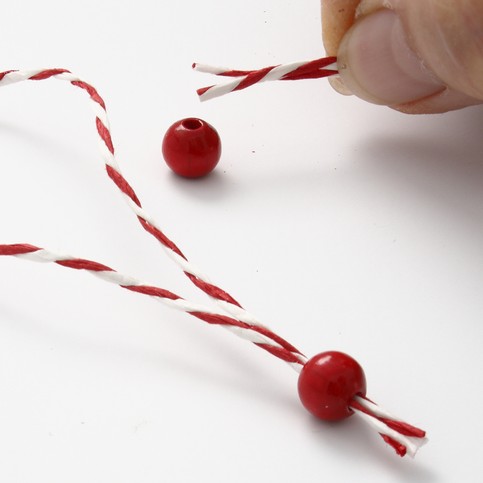
And so it continues until the desired subject is formed on the sphere. (NB If the pieces are long once applied, just cut them with scissors).
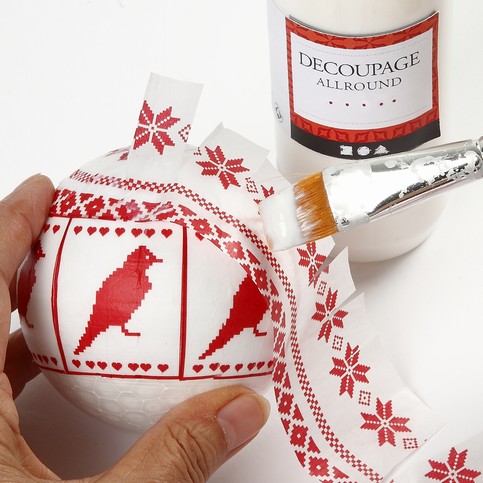
Furthermore, a final brushstroke of white acrylic glue is carried out, to give the desired final effect.
Now the cord is cut to the desired size and the bead is applied to it (as shown in the photo).

Now it will be necessary only to insert the cord of the hole, apply a drop of hot glue for a perfect seal.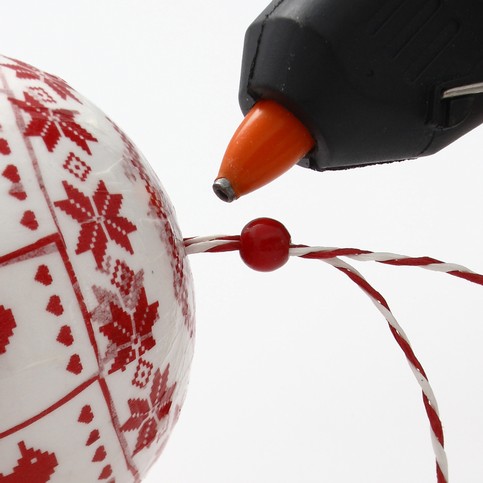
Christmas balls with the Patchwork technique
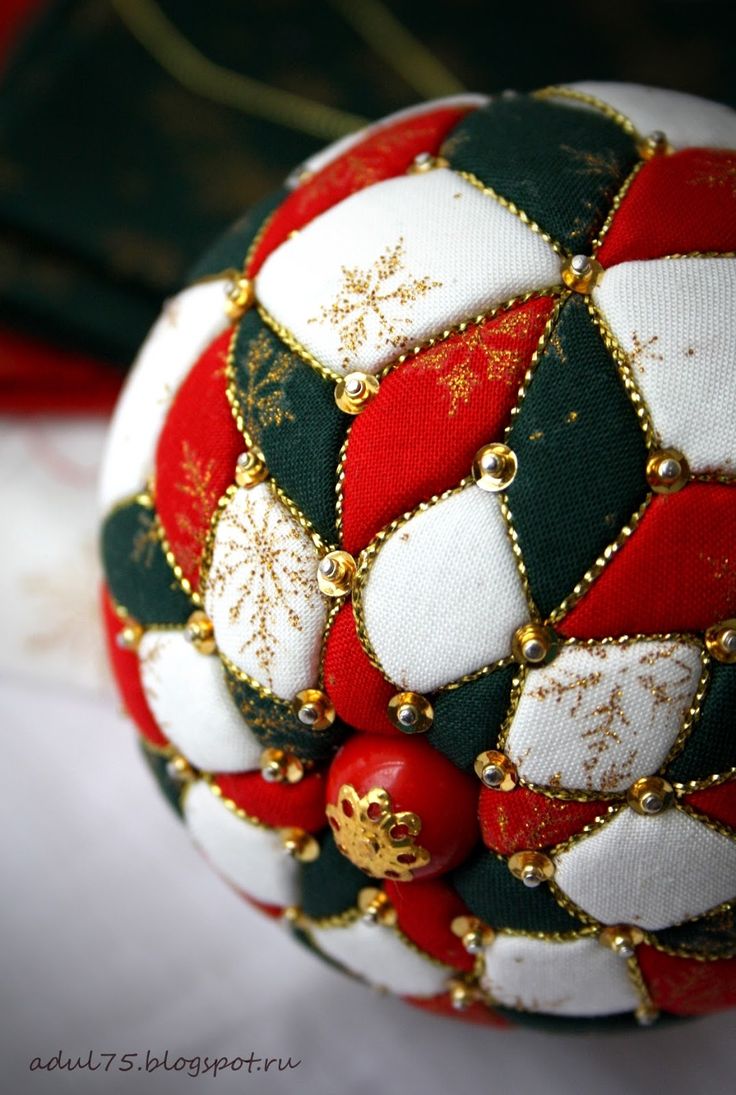
If, on the other hand, you want to make Christmas balls in Nordic style Shabby Chic you can opt for the balls made with the patchwork technique that enrich the Christmas tree of a addictive magic, given the many decorations that can be created with i ribbons colored and gilded, silvered, with beads and so on.
To make the patchwork balls no sewing skills or special equipment are required.
Material
- polystyrene balls;
- bits of fabric in the desired tones;
- hot glue;
- cords, ribbons;
- golden thread (or twine) for hook;
- cutter;
- pins;
- beads;
- nail file;
- felt tip pen;
- pen or pencil;
- baking paper;
- scissors.
Method
- Let’s dissect the polystyrene ball with the cutter, dividing it into 4 wedges. There slot it must be 1 cm deep.
- With a pen or a pencil we pierce theend of the ball, making a hole of about 3 cm (we will need it to introduce the hook) and facilitate the introduction of the fabrics into the corner.
- With a baking paper, resting on the ball, and a felt-tip pen, we obtain the shape of the wedges, which we will need to cut out the fabrics. (It is important, in the end, to cut the edges of the template 1-2 cm larger, as you have to consider the fabric to be inserted in the slots).
- Made the Shape, we place it on the chosen fabric and we obtain the pieces of cloth. (A tip: stop the shape with a pin, it will be easier to proceed with the cutout). Now that we have our 4 bits of fabric we can proceed to the next step.
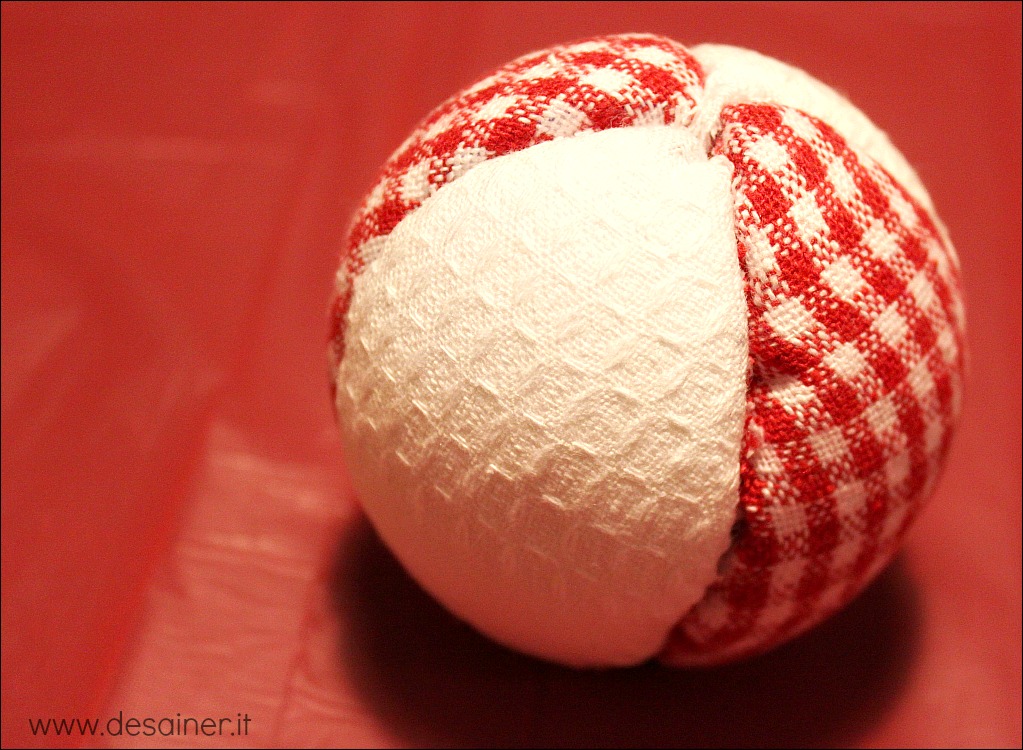
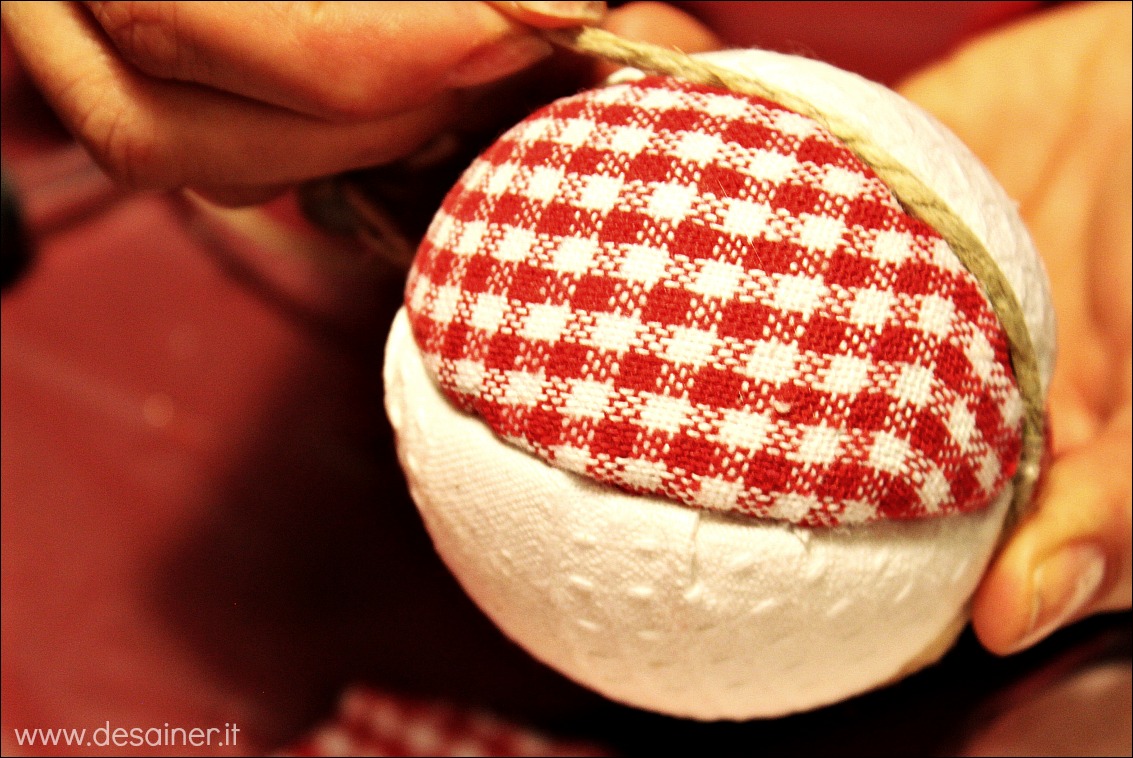
- We lay the piece of fabric on the first segment and help us with one lime for nails we insert the edges to theinside the slots.
- Let’s proceed alternating fabrics, as the video below shows, with the same mechanism. Eventually we will have ours ball covered entirely with fabric.
- Now let’s cut a golden thread of about 12 cm to accomplish the hook. We do a node with the two ends and insert the same inside one of the two ends of the ball, helping us with the lime. We stop the thread with one drop of hot glue.
- It’s time to wrap up the ribbon chosen (gilded and laced) on the creeks of the ball, which we will stop at both ends with two pins equipped with beads.
If you are unsure of the seal of the ribbon, you can apply a drop of hot glue to both ends or along its path (but be careful not to damage the fabrics!).
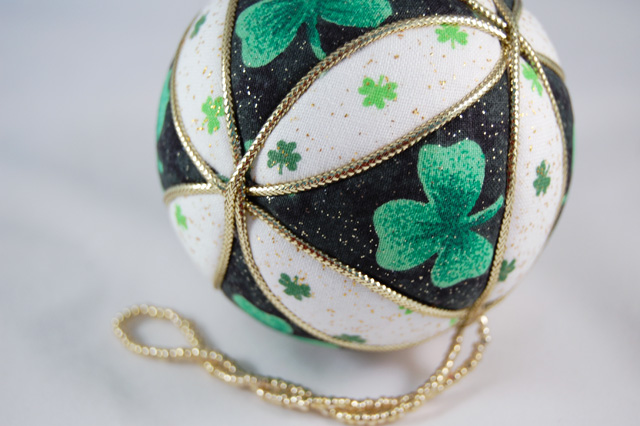
And finally our splendid ones christmas balls in patchwork they are ready!
Video Tutorial balls in Patchwork
Image gallery: DIY Christmas baubles
And now let yourself be inspired by these splendid creations, discover the most beautiful and original DIY Christmas baubles.
And if you want to follow all ours video tutorial on the do-it-yourself subscribe to Youtube channel PianetaDesign.it
DIY Christmas balls: made of polystyrene, wool, with twine, with transparent glass, the decoupage technique and covered with fabric with the patchwork technique. Video tutorial to create beautiful and magical Christmas balls for the Christmas tree.

The Christmas is now upon us and for those who want to try their hand at do-it-yourself today we propose several ideas to make magnificent Christmas balls.
DIY fabric Christmas baubles
The procedure is very simple and fast, and the result of great effect, as you can see from the images.

But let’s move on to what is needed to make this magnificent one christmas decoration.
Material
- polystyrene balls of various sizes;
- various fabrics (recycling centerpieces, shawls, Christmas ribbons);
- cords, ribbons;
- golden thread for hook;
- cutter;
- pins;
- beads;
- hot glue gun;
- nail file;
- felt tip pen;
- pen or pencil;
- baking paper;
- scissors.
Method
- Let’s dissect the polystyrene ball with the cutter, dividing it into 4 wedges. There slot it must be 1 cm deep.
- With a pen or a pencil we pierce theend of the ball, making a hole of about 3 cm (we will need it to introduce the hook) and facilitate the introduction of the fabrics into the corner.
- With a baking paper, resting on the ball, and a felt-tip pen, we obtain the shape of the wedges, which we will need to cut out the fabrics. (It is important, in the end, to cut the edges of the template 1-2 cm larger, as you have to consider the fabric to be inserted in the slots).

- Made the Shape, we place it on the chosen fabric and obtain i pieces of cloth. (A tip: stop the shape with a pin, it will be easier to proceed with the cutout). Now that we have our 4 bits of fabric we can proceed to the next step.
- We lay the piece of fabric on the first segment and help us with one lime for nails we insert the edges to theinside the slots.
- Let’s proceed alternating fabrics, as the video below shows, with the same mechanism. Eventually we will have ours ball covered entirely with fabric.
- Now let’s cut a golden thread of about 12 cm to accomplish the hook. We do a node with the two ends and insert the same inside one of the two ends of the ball, helping us with the lime. We stop the thread with one drop of hot glue.
- It’s time to wrap up the ribbon chosen (gilded and laced) on the creeks of the ball, which we will stop at both ends with two pins equipped with beads.
Read also: Furnishing your home with patchwork: ideas and useful tips
If you are unsure of the seal of the ribbon, you can apply a drop of hot glue to both ends or along its path (but be careful not to damage the fabrics!).
And finally our splendid ones fabric christmas balls they are ready!
DIY Fabric Christmas Balls Tutorial Video
Hand painted glass Christmas baubles
Very simple to be made, they are ideal for entertaining even your little ones. But let’s see what it takes to create these gorgeous ones christmas balls in glass.

Material
- glass balls
- brushes
- solvent
- colors for the glass (red and white)
- red wool
Method
Think of a subject to draw on ball and draw it Shape on a sheet.

In our case, first, we have drawn down the snow, coloring of White 1/3 of the ball.
At this point we used the red to paint the silhouettes of little houses and of trees.
Then with the White we completed the work by drawing doors is windows at houses, the snow and the latest decorations on the trees.
Finally we realized with a wire of wool red the hook to hang the bauble on the Christmas tree.
You may be interested in: Christmas decorations with decoupage: wonderful ideas for beautifying your home
It was a lot of fun doing this job, and the result is great effect!
Video Tutorial DIY Glass Christmas Balls
Christmas baubles with DIY decoupage
The technique of decoupage it is very simple and fun, because you can indulge yourself in the choice of subjects and can also be performed by children.

Materials
- decorative polystyrene balls
- napkins or decoupage paper
- brushes and sponges
- hot glue
- acrylic glue
- colored ribbons and wooden beads
- scissors
Method
But now let’s move on to the work, here are the steps to follow to make beautiful balls with decoupage.
Do you want design advice on how to furnish? Join the group
First we choose the subject we want to give to the ball, then we cut it out and then we cut out the image, to make sure that it can be applied easily on the spherical surface.

At this point the image can be applied to the ball using the special glue for decoupage (acrylic).
And so it continues until the desired subject is formed on the sphere. (NB If the pieces are long once applied, just cut them with scissors).

Furthermore, a final brushstroke of white acrylic glue is carried out, to give the desired final effect.
Now the cord is cut to the desired size and the bead is applied to it (as shown in the photo).

Now it will be necessary only to insert the cord of the hole, apply a drop of hot glue for a perfect seal.
Christmas balls with the Patchwork technique

If, on the other hand, you want to make Christmas balls in Nordic style Shabby Chic you can opt for the balls made with the patchwork technique that enrich the Christmas tree of a addictive magic, given the many decorations that can be created with i ribbons colored and gilded, silvered, with beads and so on.
To make the patchwork balls no sewing skills or special equipment are required.
Material
- polystyrene balls;
- bits of fabric in the desired tones;
- hot glue;
- cords, ribbons;
- golden thread (or twine) for hook;
- cutter;
- pins;
- beads;
- nail file;
- felt tip pen;
- pen or pencil;
- baking paper;
- scissors.
Method

- Let’s dissect the polystyrene ball with the cutter, dividing it into 4 wedges. There slot it must be 1 cm deep.
- With a pen or a pencil we pierce theend of the ball, making a hole of about 3 cm (we will need it to introduce the hook) and facilitate the introduction of the fabrics into the corner.
- With a baking paper, resting on the ball, and a felt-tip pen, we obtain the shape of the wedges, which we will need to cut out the fabrics. (It is important, in the end, to cut the edges of the template 1-2 cm larger, as you have to consider the fabric to be inserted in the slots).
- Made the Shape, we place it on the chosen fabric and we obtain the pieces of cloth. (A tip: stop the shape with a pin, it will be easier to proceed with the cutout). Now that we have our 4 bits of fabric we can proceed to the next step.

- We lay the piece of fabric on the first segment and help us with one lime for nails we insert the edges to theinside the slots.
- Let’s proceed alternating fabrics, as the video below shows, with the same mechanism. Eventually we will have ours ball covered entirely with fabric.
- Now let’s cut a golden thread of about 12 cm to accomplish the hook. We do a node with the two ends and insert the same inside one of the two ends of the ball, helping us with the lime. We stop the thread with one drop of hot glue.

- It’s time to wrap up the ribbon chosen (gilded and laced) on the creeks of the ball, which we will stop at both ends with two pins equipped with beads.
If you are unsure of the seal of the ribbon, you can apply a drop of hot glue to both ends or along its path (but be careful not to damage the fabrics!).

And finally our splendid ones christmas balls in patchwork they are ready!
Video Tutorial balls in Patchwork
Image gallery: DIY Christmas baubles
And now let yourself be inspired by these splendid creations, discover the most beautiful and original DIY Christmas baubles.
And if you want to follow all ours video tutorial on the do-it-yourself subscribe to Youtube channel PianetaDesign.it

