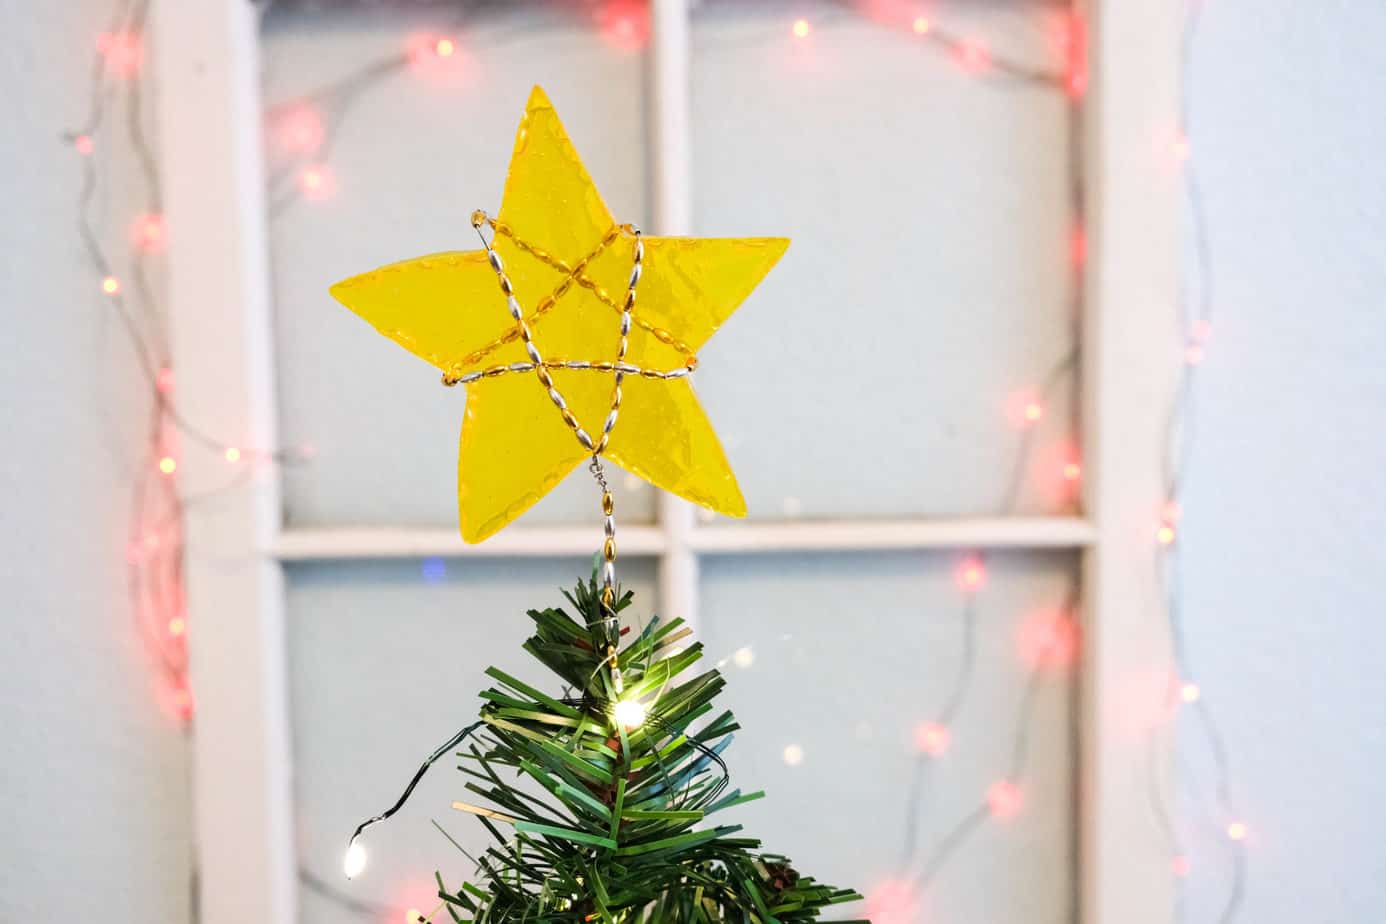
If you are tired of the usual decorations, but do not know how to build a star for the tip of the Christmas tree, in our article you will know 3 ideas on how to make a topper for your tree entirely made with your own hands.

Decorating the Christmas tree is a special moment, but it can be less fun when you don’t have clear ideas on how to decorate it if you are always looking for something new. Among the main Christmas decorations, apart from the inevitable balls and lights, the tip is shown without which the tree seems not to be complete.
If you want to add to your tree a decoration altogether different and original, you can experiment the creation of a decoration made with your hands. About that we have thought of offering you 3 ideas different on how to build a star for the tip of the Christmas tree.
Also read: How to Build a Star for a DIY Christmas Tree Tip
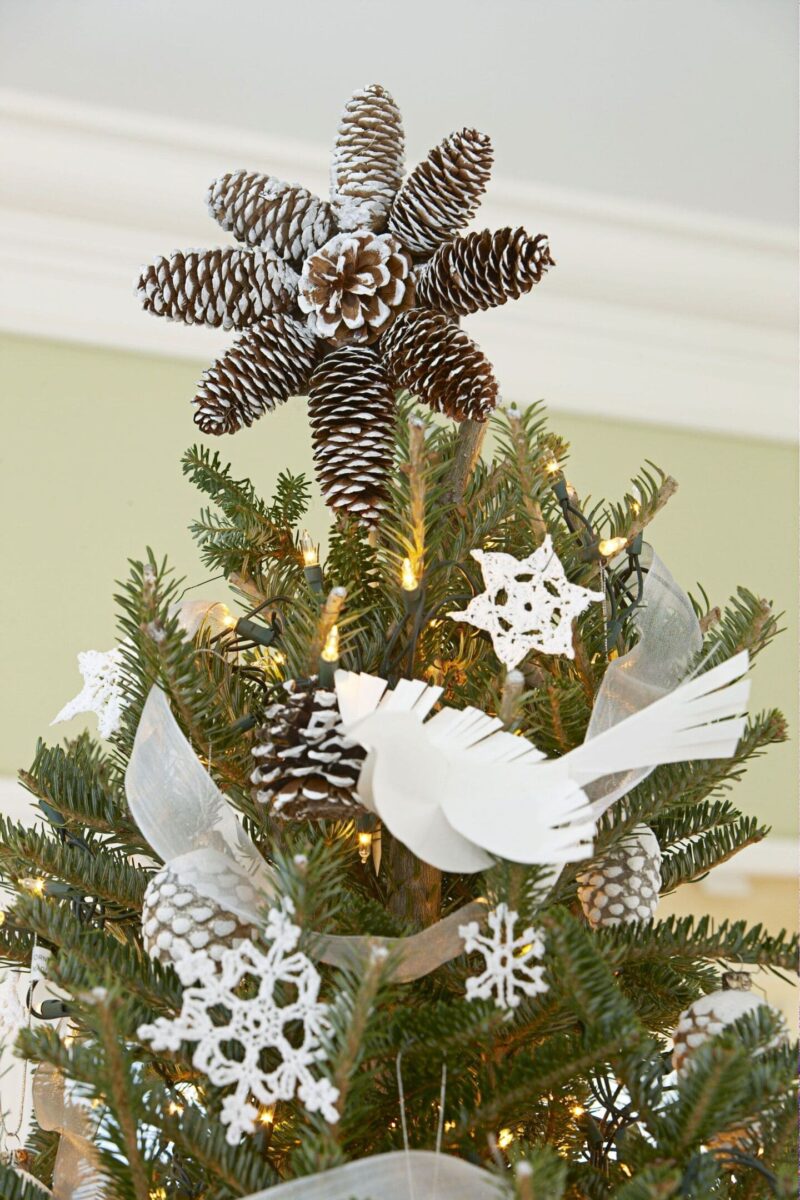
1. A pinecone star
If you have chosen to decorate the Christmas tree with very simple decorations, you can build a star using pine cones. It is a very simple tutorial, but you will see that the final result will be very satisfying.
You will serve:
- 9 small pine cones
- vinyl glue
- brush or sponge
- white acrylic color
- cardboard
- scissors
- ribbon (of the color you prefer).
- The first step to take is whiten the pine cones to give the impression that they are covered in snow. Then with the help of a sponge or a brush, dip in the white color and dab the color on the tips of the pine cones. Place on a paper-covered surface to keep it from getting dirty, and let it dry.
- Now take the cardboard and draw a circle of a diameter sufficient to contain all the pine cones, calculating that you will arrange 8 pine cones all around and a central one. One time then drawn the cardboard you can cut.
- Fill the card with hot glue and place the pine cone smaller what do you have, in the center so that it is clearly visible is all the other pine cones in a circle, as if I wanted to create the rays of the sun like those that are drawn as children.
- Now you just have to paste in the back of the cardboard, a ribbon to be able to insert it on the tip and the pinecone star is ready!

2. A bright star
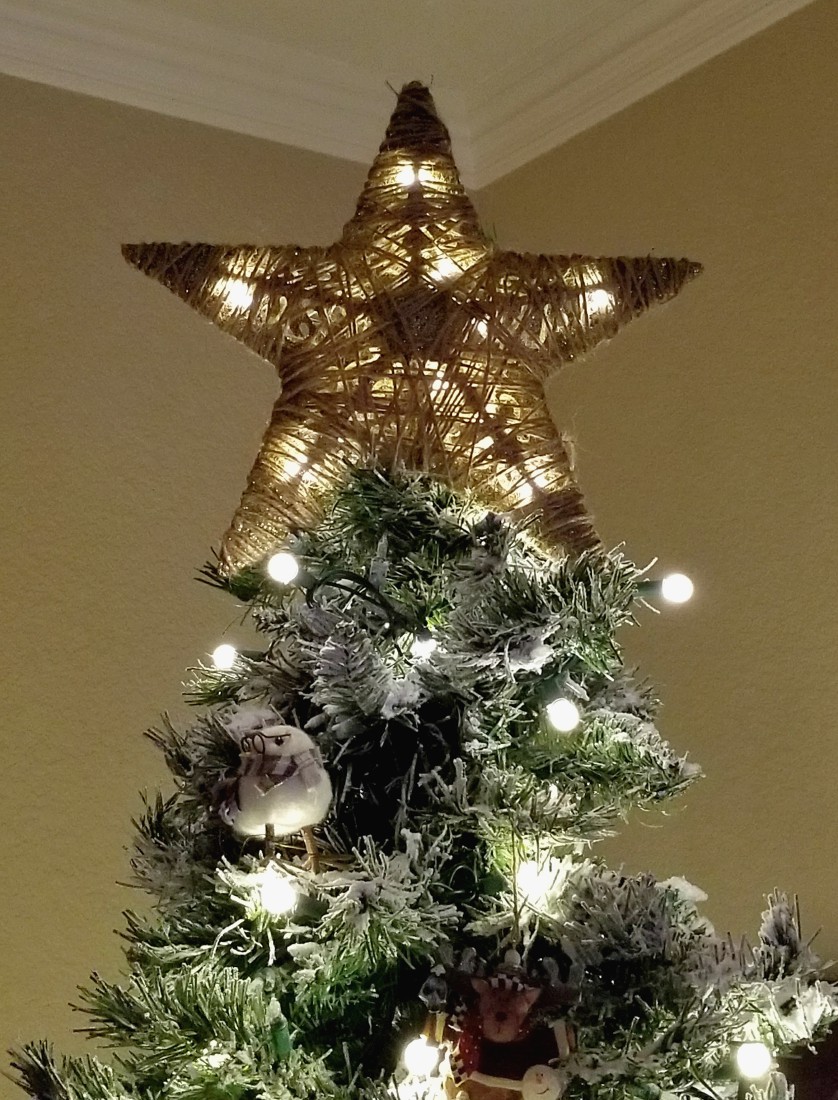
If you want something special for your tree, but at the same time easy to make, we have the right tutorial for you. What we propose below in fact, it is simple to create with your own hands and will give the tree a brighter touch.
You will need:
- a cardboard
- scissors
- jute twine thread
- Christmas lights white or colored (according to your preference).
- On the cardboard make the shape of a star, as big as you want to make it look good on your tree. Cut it the shape is Now drill large and small holes on all 5 tips, even without following a precise pattern. The important thing is to get a star all perforated, or at least in part, when the work is finished.
- Set off from a point of the star is wrap the twine around it until the entire cardboard base is covered.
- Now put the lights in the back of the star and tuck the small bulbs inside the spaces of the wire, so that lights don’t move.
To make the star adhere to the tree you have two alternatives: use the lights or string to continue wrapping the star at the tip of the tree.
It may interest you: Making the tip of the Christmas tree do it yourself: our ideas
Turn on the lights and you will see that your bright star will give a more magical touch to your tree.

3. A star intertwining
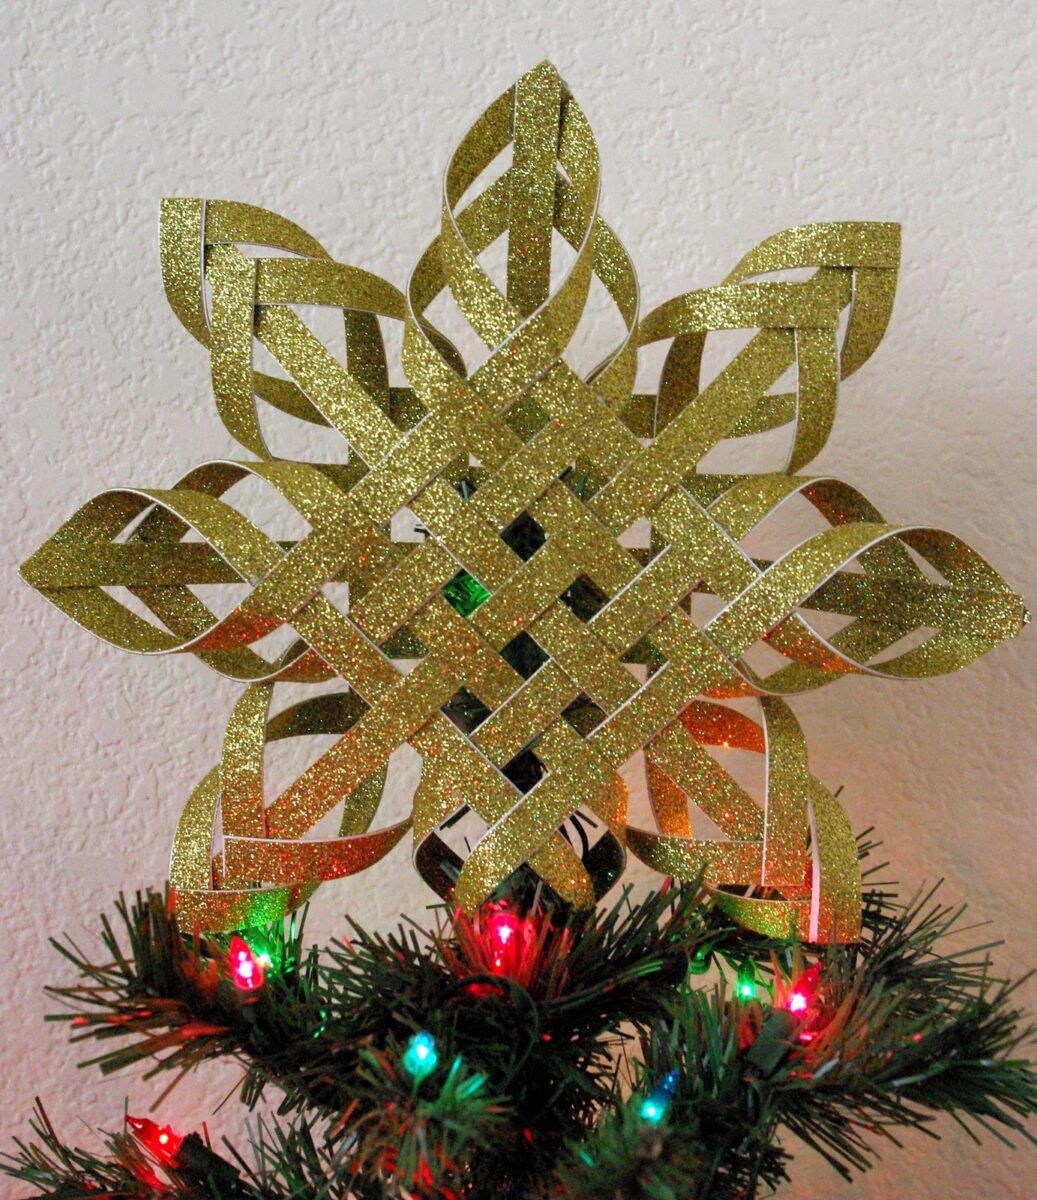
A star for the tree can he have different forms, and in this case it can to be a star formed by intertwining. Also, the one we’re going to tell you about next is a bright star that is sure to show off on your tree.
You they will need:
- 2 gold glitter cards (or the color you prefer) 30 × 30 cm each
- scissors
- hot glue.
- Cut 20 strips 1 cm wide or a little more, if you can’t be very precise. The important thing is that all the strips have the same width.
- Fold two strips in half so that the mark in the center is visible. Now place the two strips on a work surface so that they form a cross, so the one will go over the other exactly in the center. Glue them between them with hot glue.
- Lay down 4 vertical and 4 horizontal strips, on the cross you just made. Intertwine the strips between them as if you were making a braid, and at each intertwining put the hot glue to prevent your work from ruining halfway through. At this point you will have got a kind of grid.
- Now the most challenging step awaits you. Place the grid so that it looks like a rumble in front of you. Start from the bottom and take one strip to the right and one to the left, join the two tips and glue. Do the same with the two strips immediately after. Turn the grill again and do the same step for each corner until you get 4 corners rounded inwards, per side. So in this way only 4 strips will be out of the weave, or one for each side.
- Do the same steps with the second card, making sure you follow each procedure carefully.
- When the second star is ready too, flip one star and place it on the other so that you will have an 8-pointed star in front of you.
- Weave the strips what were remained out of the plot, paste everything with hot glue and cut the superfluous.
At this point, all you have to do is place the intertwined star on the tip of your tree and admire your masterpiece on display.
Do you want design advice on how to furnish? Join the group

3 ideas on how to build a star for the tip of the Christmas tree – pictures and photos
This year make your tree sparkle with a DIY star you can place on the tip of your tree. With just a few items and our tutorials it will be very easy for you to make one.

- Tourism expert diploma
- Web writing and SEO copywriting courses
- Copywriter and author specializing in Design, Tourism, Furniture, Lifestyle
If you are tired of the usual decorations, but do not know how to build a star for the tip of the Christmas tree, in our article you will know 3 ideas on how to make a topper for your tree entirely made with your own hands.

Decorating the Christmas tree is a special moment, but it can be less fun when you don’t have clear ideas on how to decorate it if you are always looking for something new. Among the main Christmas decorations, apart from the inevitable balls and lights, the tip is shown without which the tree seems not to be complete.
If you want to add to your tree a decoration altogether different and original, you can experiment the creation of a decoration made with your hands. About that we have thought of offering you 3 ideas different on how to build a star for the tip of the Christmas tree.
Also read: How to Build a Star for a DIY Christmas Tree Tip
1. A pinecone star
If you have chosen to decorate the Christmas tree with very simple decorations, you can build a star using pine cones. It is a very simple tutorial, but you will see that the final result will be very satisfying.
You will serve:
- 9 small pine cones
- vinyl glue
- brush or sponge
- white acrylic color
- cardboard
- scissors
- ribbon (of the color you prefer).
- The first step to take is whiten the pine cones to give the impression that they are covered in snow. Then with the help of a sponge or a brush, dip in the white color and dab the color on the tips of the pine cones. Place on a paper-covered surface to keep it from getting dirty, and let it dry.
- Now take the cardboard and draw a circle of a diameter sufficient to contain all the pine cones, calculating that you will arrange 8 pine cones all around and a central one. One time then drawn the cardboard you can cut.
- Fill the card with hot glue and place the pine cone smaller what do you have, in the center so that it is clearly visible is all the other pine cones in a circle, as if I wanted to create the rays of the sun like those that are drawn as children.
- Now you just have to paste in the back of the cardboard, a ribbon to be able to insert it on the tip and the pinecone star is ready!

2. A bright star
If you want something special for your tree, but at the same time easy to make, we have the right tutorial for you. What we propose below in fact, it is simple to create with your own hands and will give the tree a brighter touch.
You will need:
- a cardboard
- scissors
- jute twine thread
- Christmas lights white or colored (according to your preference).
- On the cardboard make the shape of a star, as big as you want to make it look good on your tree. Cut it the shape is Now drill large and small holes on all 5 tips, even without following a precise pattern. The important thing is to get a star all perforated, or at least in part, when the work is finished.
- Set off from a point of the star is wrap the twine around it until the entire cardboard base is covered.
- Now put the lights in the back of the star and tuck the small bulbs inside the spaces of the wire, so that lights don’t move.
To make the star adhere to the tree you have two alternatives: use the lights or string to continue wrapping the star at the tip of the tree.
It may interest you: Making the tip of the Christmas tree do it yourself: our ideas
Turn on the lights and you will see that your bright star will give a more magical touch to your tree.

3. A star intertwining
A star for the tree can he have different forms, and in this case it can to be a star formed by intertwining. Also, the one we’re going to tell you about next is a bright star that is sure to show off on your tree.
You they will need:
- 2 gold glitter cards (or the color you prefer) 30 × 30 cm each
- scissors
- hot glue.
- Cut 20 strips 1 cm wide or a little more, if you can’t be very precise. The important thing is that all the strips have the same width.
- Fold two strips in half so that the mark in the center is visible. Now place the two strips on a work surface so that they form a cross, so the one will go over the other exactly in the center. Glue them between them with hot glue.
- Lay down 4 vertical and 4 horizontal strips, on the cross you just made. Intertwine the strips between them as if you were making a braid, and at each intertwining put the hot glue to prevent your work from ruining halfway through. At this point you will have got a kind of grid.
- Now the most challenging step awaits you. Place the grid so that it looks like a rumble in front of you. Start from the bottom and take one strip to the right and one to the left, join the two tips and glue. Do the same with the two strips immediately after. Turn the grill again and do the same step for each corner until you get 4 corners rounded inwards, per side. So in this way only 4 strips will be out of the weave, or one for each side.
- Do the same steps with the second card, making sure you follow each procedure carefully.
- When the second star is ready too, flip one star and place it on the other so that you will have an 8-pointed star in front of you.
- Weave the strips what were remained out of the plot, paste everything with hot glue and cut the superfluous.
At this point, all you have to do is place the intertwined star on the tip of your tree and admire your masterpiece on display.
Do you want design advice on how to furnish? Join the group

3 ideas on how to build a star for the tip of the Christmas tree – pictures and photos
This year make your tree sparkle with a DIY star you can place on the tip of your tree. With just a few items and our tutorials it will be very easy for you to make one.

- Tourism expert diploma
- Web writing and SEO copywriting courses
- Copywriter and author specializing in Design, Tourism, Furniture, Lifestyle

