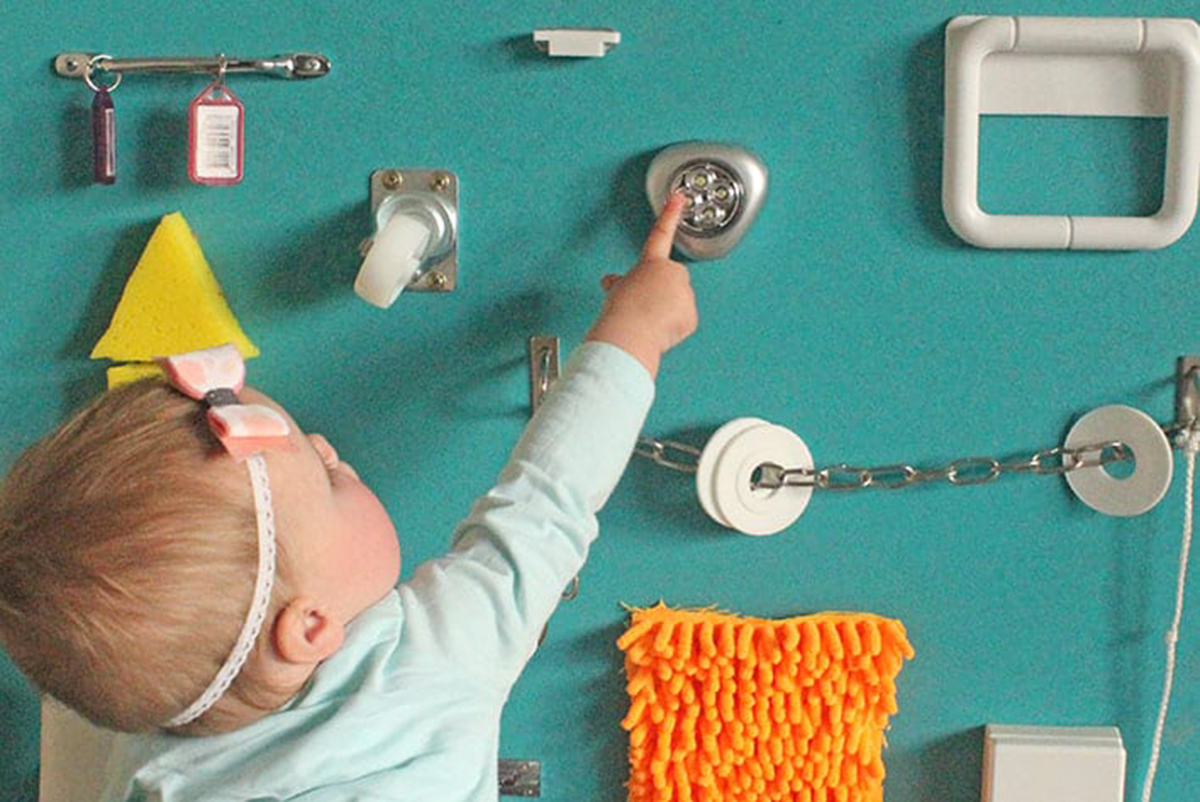
The Montessori sensory panel is considered a fundamental tool for the cognitive development of children, from the first months of life. In fact, one of the first senses through which children learn and discover the world is touch. From an early age, children touch any type of object and learn its function with their hands. Guide and tips for doing it yourself at home.
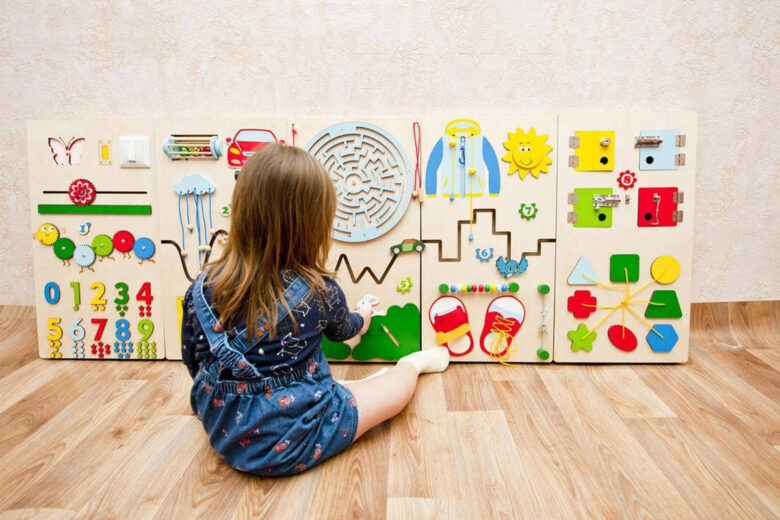
Maria Montessori, doctor, educator and pedagogist, with her educational method, revolutionized the teaching system. At the center of everything he put the child. According to the Montessori method, the child he must be free to move and discover the surrounding world. In this way, not only will the child be able to learn more effectively, but he will also be able to develop your self-esteem, the sense of autonomy and to acquire safety.
To do this the child needs to touch objects by hand surrounding it and of discover their function. Sensory panels have precisely this function, that of allowing the child, through tests and attempts to discover the differences between objects, or the consistency of materials.
Read also: Montessori style home: how to develop your child’s creativity
But how to make a Montessori sensory panel? There are many models on the market. But if you have a little time and a little imagination you will find that it is quite simple to make.
How a sensory panel is made
Also known as sensory table, the sensory panel is consisting of a rigid base I’m on placed different types of materials and several opening and closing systems. These objects and materials have the goal of make the child understand their function and also the different consistencies of the materials.
The Montessori sensory panel is considered a tool fundamental for the cognitive development of the child from 12 months to 3 years. In fact, depending on the age of the child, the sensory panel will contain different objects and materials. But let’s see how to build the sensory panel.
Why make a sensory panel
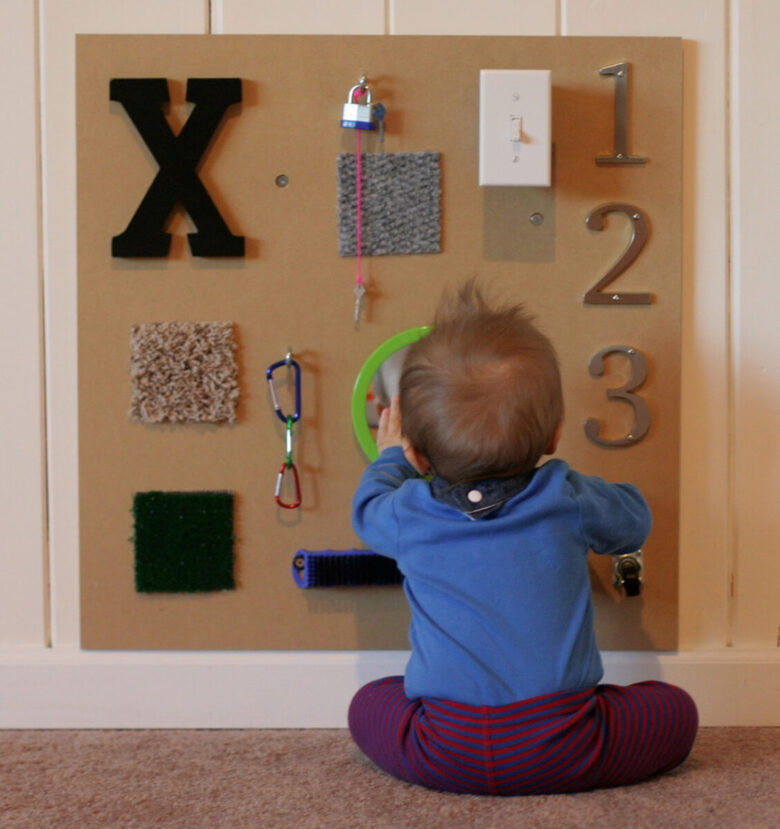
The sensory panel it has the function of stimulating the child development of some skills that we can thus summarize.
- Manual skills. Touching with his hands the child discovers the various textures and differences between objects and materials.
- Concentration. The child will learn that in order to achieve a result, he will have to work and concentrate.
- Coordination. The child will learn that some operations must be done in succession. Not only to achieve certain results will have to strive to use multiple senses and coordinate them.
You might be interested in: 10 simple ideas for making a musical instrument
How to build a sensory panel
The important premise to do before you start building your sensory panel is that you will have to get yourself obviously gods materials that are not dangerous for the child. Protecting its safety is essential. Depending on theage of the child, you can choose different objects and materials.
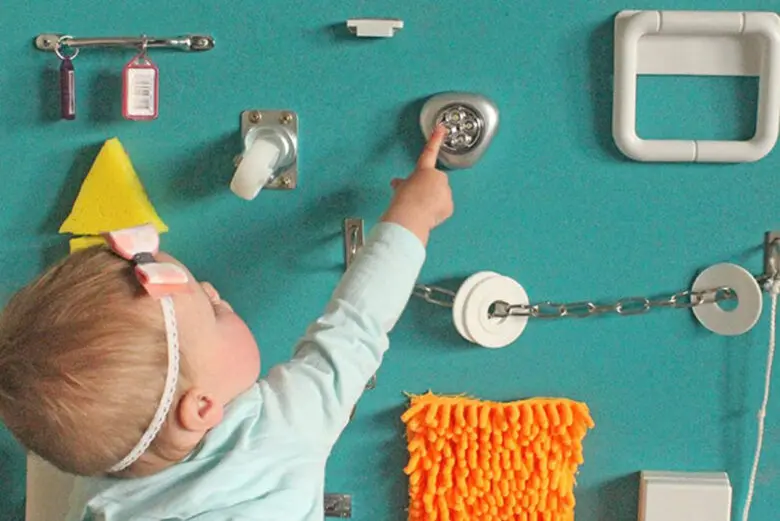
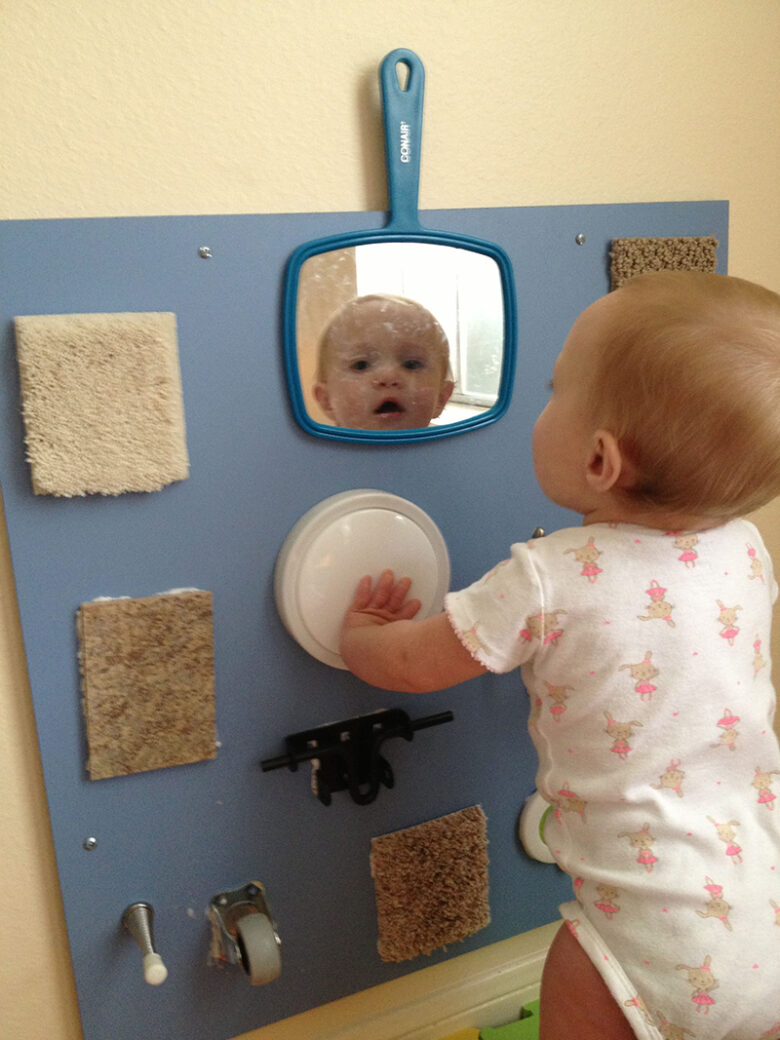
For example, let’s start with a youngest child that has around 12 months. Get yourself a rigid support, even a fairly strong cardboard will work. Choose various types of materials. For example you can use silver paper, or, a sponge, one mirror, a switch, one wheel, buttons, plastic, rubber. All elements that the child can touch and rest assured that he can spend hours here, engaging in the discovery of all the elements.
Do you want design advice on how to furnish? Join the group
The panel can be fixed to a wall, or simply resting on a carpet.
Sensory panel for older children
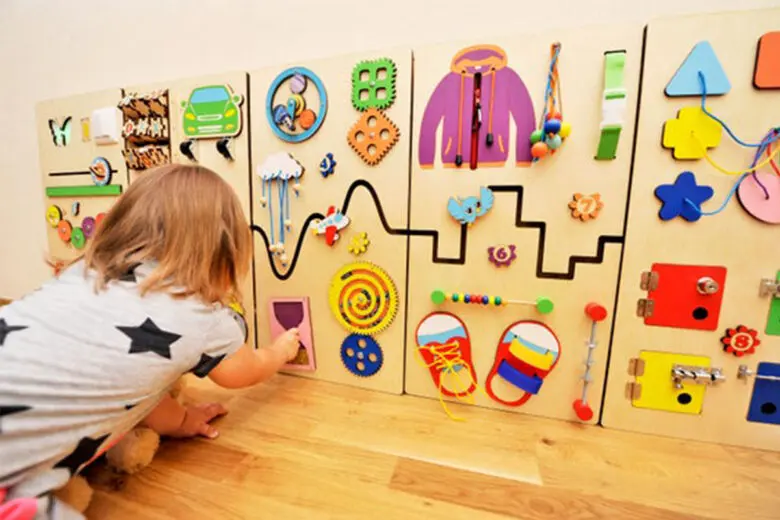
If yours child is a little bit bigger, aage from 2 to 3 years you can make a more complex sensory panel. Also in this case the first thing to do is to choose the right materials that obviously do not represent a danger to the child.
In this case, you can choose a stiffer support, because the sensory panel will have to contain heavier objects and therefore it must be tough enough.
Get yourself a plywood or wood panel and of course, make sure there are no sharp parts or dangerous edges. At this point choose the objects you want to insert.
Let yourself be inspired by your imagination also for panel decoration. As in the photo below, you can for example draw shoes and insert laces, so that children learn to tie or untie knots. Or you can put some rubber decorations. Or you can put a bolt and one chain, or even of the locks. Another very important element can be a on or off switch that actually turns on or off.
The objects and materials to be inserted can be the most disparate. After fixing all the elements on the panel with glue or screws, for heavier objects, you can place the panel on a wall. Rest assured that your children will spend a lot of their time discovering all the contents of the sensory panel.
Montessori sensory panels: photos and images
The Montessori method puts the child at the center of the whole. The cognitive development of the child occurs mainly during the first years of life in the exploration of the world around him. For this reason, the child must be able to move freely. In this way he will be able to acquire greater security, autonomy and self-esteem. Browse the gallery and find out how to make a sensory panel.
The Montessori sensory panel is considered a fundamental tool for the cognitive development of children, from the first months of life. In fact, one of the first senses through which children learn and discover the world is touch. From an early age, children touch any type of object and learn its function with their hands. Guide and tips for doing it yourself at home.

Maria Montessori, doctor, educator and pedagogist, with her educational method, revolutionized the teaching system. At the center of everything he put the child. According to the Montessori method, the child he must be free to move and discover the surrounding world. In this way, not only will the child be able to learn more effectively, but he will also be able to develop your self-esteem, the sense of autonomy and to acquire safety.
To do this the child needs to touch objects by hand surrounding it and of discover their function. Sensory panels have precisely this function, that of allowing the child, through tests and attempts to discover the differences between objects, or the consistency of materials.
Read also: Montessori style home: how to develop your child’s creativity
But how to make a Montessori sensory panel? There are many models on the market. But if you have a little time and a little imagination you will find that it is quite simple to make.
How a sensory panel is made
Also known as sensory table, the sensory panel is consisting of a rigid base I’m on placed different types of materials and several opening and closing systems. These objects and materials have the goal of make the child understand their function and also the different consistencies of the materials.
The Montessori sensory panel is considered a tool fundamental for the cognitive development of the child from 12 months to 3 years. In fact, depending on the age of the child, the sensory panel will contain different objects and materials. But let’s see how to build the sensory panel.

Why make a sensory panel
The sensory panel it has the function of stimulating the child development of some skills that we can thus summarize.
- Manual skills. Touching with his hands the child discovers the various textures and differences between objects and materials.
- Concentration. The child will learn that in order to achieve a result, he will have to work and concentrate.
- Coordination. The child will learn that some operations must be done in succession. Not only to achieve certain results will have to strive to use multiple senses and coordinate them.

You might be interested in: 10 simple ideas for making a musical instrument
How to build a sensory panel
The important premise to do before you start building your sensory panel is that you will have to get yourself obviously gods materials that are not dangerous for the child. Protecting its safety is essential. Depending on theage of the child, you can choose different objects and materials.
For example, let’s start with a youngest child that has around 12 months. Get yourself a rigid support, even a fairly strong cardboard will work. Choose various types of materials. For example you can use silver paper, or, a sponge, one mirror, a switch, one wheel, buttons, plastic, rubber. All elements that the child can touch and rest assured that he can spend hours here, engaging in the discovery of all the elements.
Do you want design advice on how to furnish? Join the group
The panel can be fixed to a wall, or simply resting on a carpet.

Sensory panel for older children
If yours child is a little bit bigger, aage from 2 to 3 years you can make a more complex sensory panel. Also in this case the first thing to do is to choose the right materials that obviously do not represent a danger to the child.
In this case, you can choose a stiffer support, because the sensory panel will have to contain heavier objects and therefore it must be tough enough.
Get yourself a plywood or wood panel and of course, make sure there are no sharp parts or dangerous edges. At this point choose the objects you want to insert.
Let yourself be inspired by your imagination also for panel decoration. As in the photo below, you can for example draw shoes and insert laces, so that children learn to tie or untie knots. Or you can put some rubber decorations. Or you can put a bolt and one chain, or even of the locks. Another very important element can be a on or off switch that actually turns on or off.
The objects and materials to be inserted can be the most disparate. After fixing all the elements on the panel with glue or screws, for heavier objects, you can place the panel on a wall. Rest assured that your children will spend a lot of their time discovering all the contents of the sensory panel.

Montessori sensory panels: photos and images
The Montessori method puts the child at the center of the whole. The cognitive development of the child occurs mainly during the first years of life in the exploration of the world around him. For this reason, the child must be able to move freely. In this way he will be able to acquire greater security, autonomy and self-esteem. Browse the gallery and find out how to make a sensory panel.

